How to secure an AWS EC2 instance with the BlastShield™ Host Agent
This guide will explain how to secure your AWS EC2 instance, enable secure remote access with end-to-end encryption, and authenticate users with multi-factor authentication using a BlastShield™ Host Agent.
Introduction
Amazon’s Elastic Compute Cloud, also referred to as EC2, provides virtual servers on the Amazon Web Services (AWS) infrastructure. EC2 is sold as a service and comes in different types (CPU, memory, storage, OS) which are suitable for running various types of workloads. An EC2 instance is created from an Amazon Machine Image (AMI) which is a template for the instance’s root volume and includes the OS and applications, permissions, and storage.
Amazon gives you various ways to remotely connect to an EC2 instance, including SSH, RDP and via the Systems Management session manager. For EC2 instances running in private subnets, AWS also offers the Instance Connect feature that uses their Identity and Management (IAM) service and one-time SSH keys. This can be complex to configure and can often require writing JSON for the IAM configurations.
The BlastShield™ Host Agent may be used to protect EC2 instances with simple configuration and provides integrated password-less multi-factor authentication with micro-segmentation and zero-trust policy. BlastShield™ deploys as a software overlay network and encrypts the connections between protected virtual instances and the remote users. To access the encrypted network, the remote user must authenticate using the BlastShield™ mobile authenticator app which uses multi-factor authentication with no passwords. Encrypted connections between protected instances and users are created on a peer-to-peer basis. BlastShield™ will manage any NAT traversal required, and no changes to the underlying routing or access control are necessary.
Prerequisites
An AWS EC2 Instance. This example uses Amazon Linux 2, but the Host Agent supports all modern Windows, Linux and macOS builds. See the following link for a list of supported operating systems.
Connection to a BlastShield™ Orchestrator.
SSH access enabled to the Linux instance.
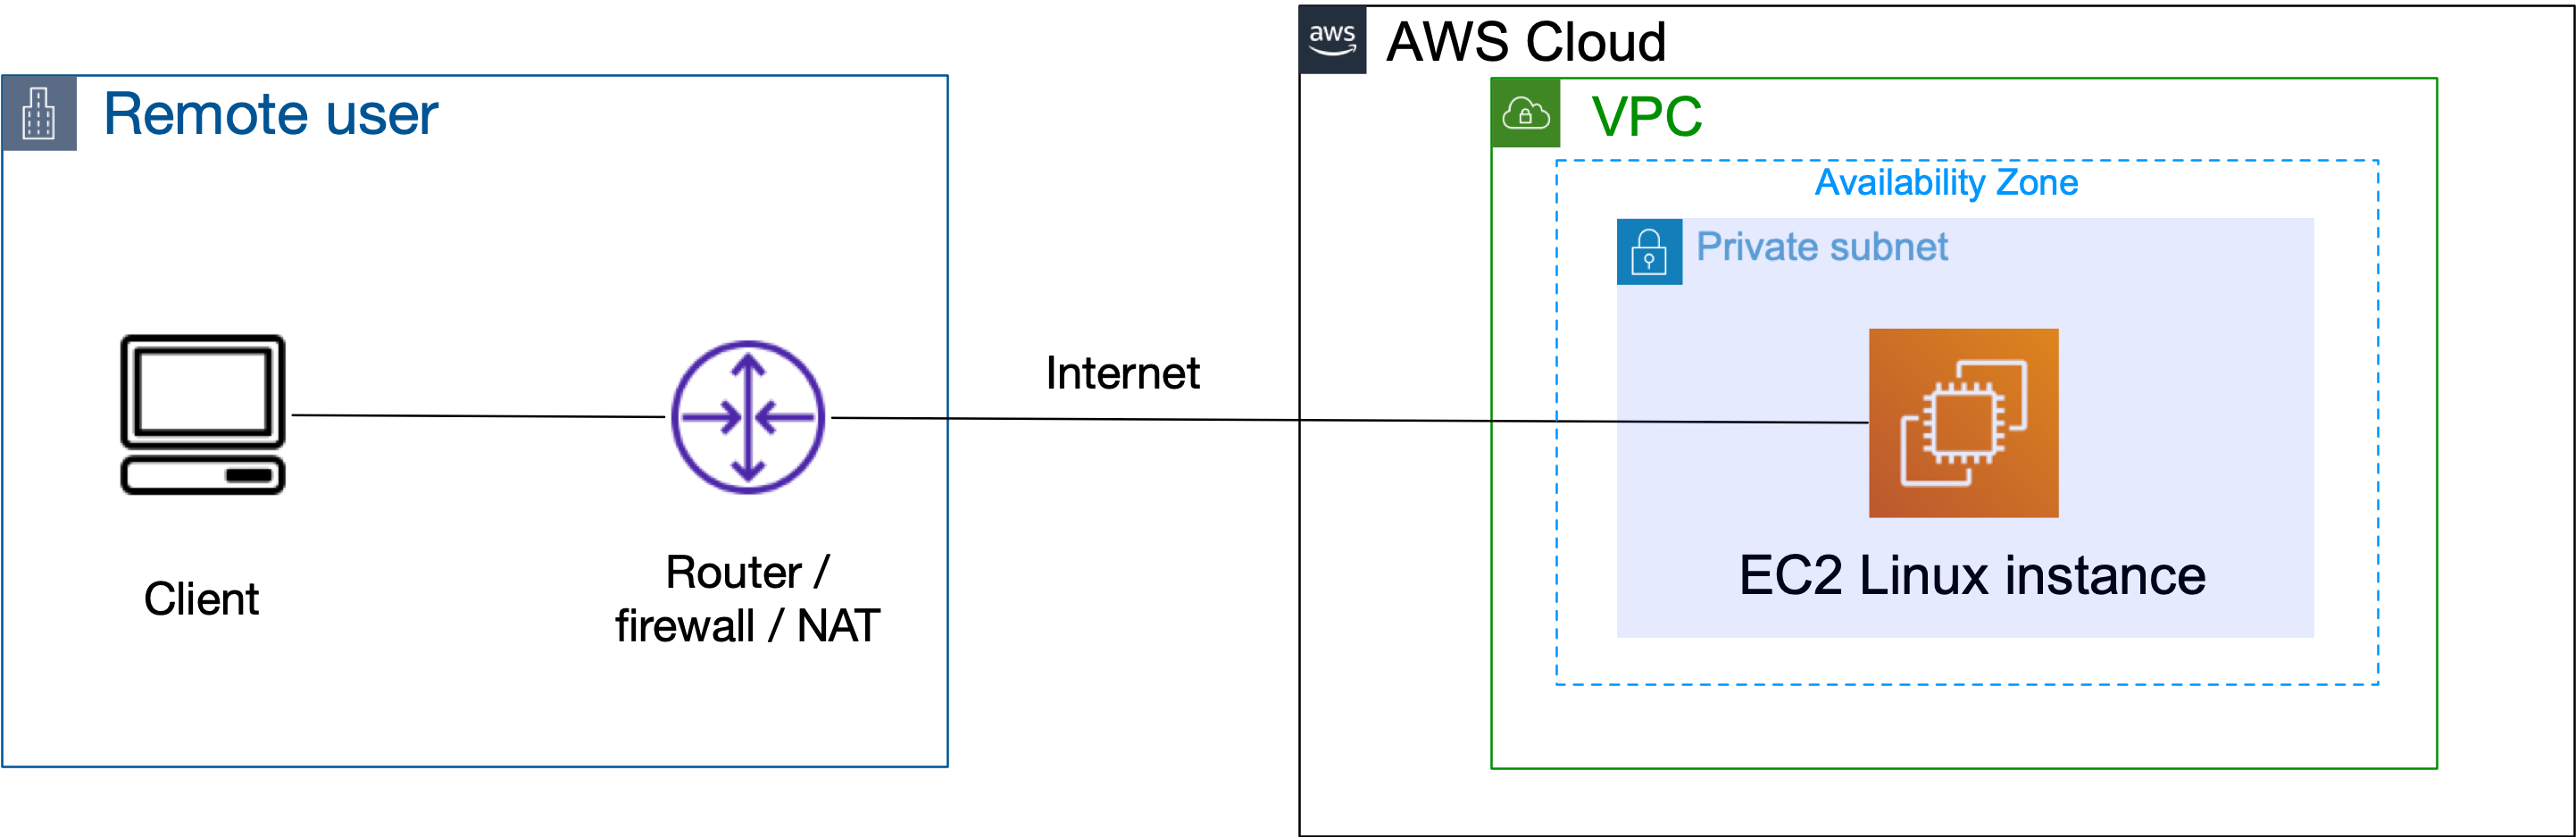
Setup
Setup with BlastShield is very quick and you should be able to get connectivity working in about 5 minutes. Before you start, your connection to the EC2 instance should look like the figure below.
Add a new Agent in the Orchestrator
Click on "Agents" in the "Manage" menu in the the left sidebar, and then click the red "Add New Agent" button at the top right.
The New Agent dialogue opens. Add a name for the Agent and a DNS Hostname. The DNS Hostname is optional and can be used to identify the Agent in the BlastShield™ network as BlastShield runs its own DNS.
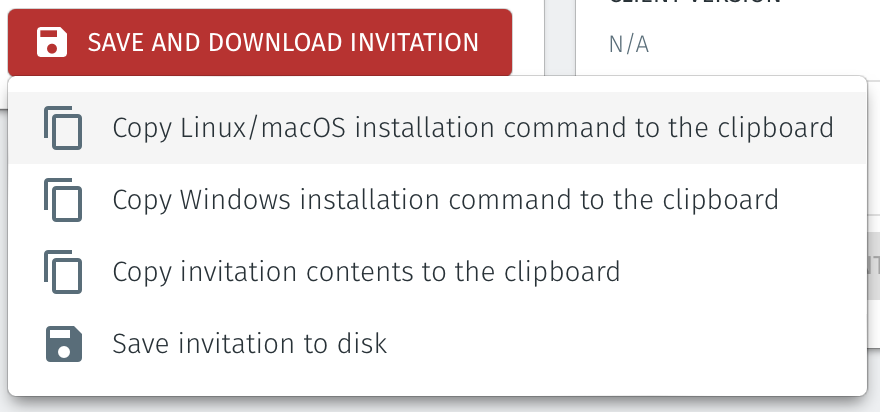
Then click on the red "Save and Download Invitation" button and choose the option for "Save and copy Linux/macOS installation command to the clipboard". Click on that option to copy the command.
Install and register the Agent
Open a terminal session on the host where you are going to install the Agent.
Paste the command you just copied to the terminal and hit enter. This will start the software download.
The software will automatically install and run. The Agent will then automatically register with the Orchestrator. When the process has completed you will see the following message in the terminal window:
Installation successful, the agent IP address is <Agent IP address>
Check the status of the Agent
Now that the installation and registration processes have completed, your Agent is up and running.
You can check the status of the Agent by typing the following:
sudo systemctl status blastshield
The logs may be viewed as follows:
sudo journalctl -u blastshield.service
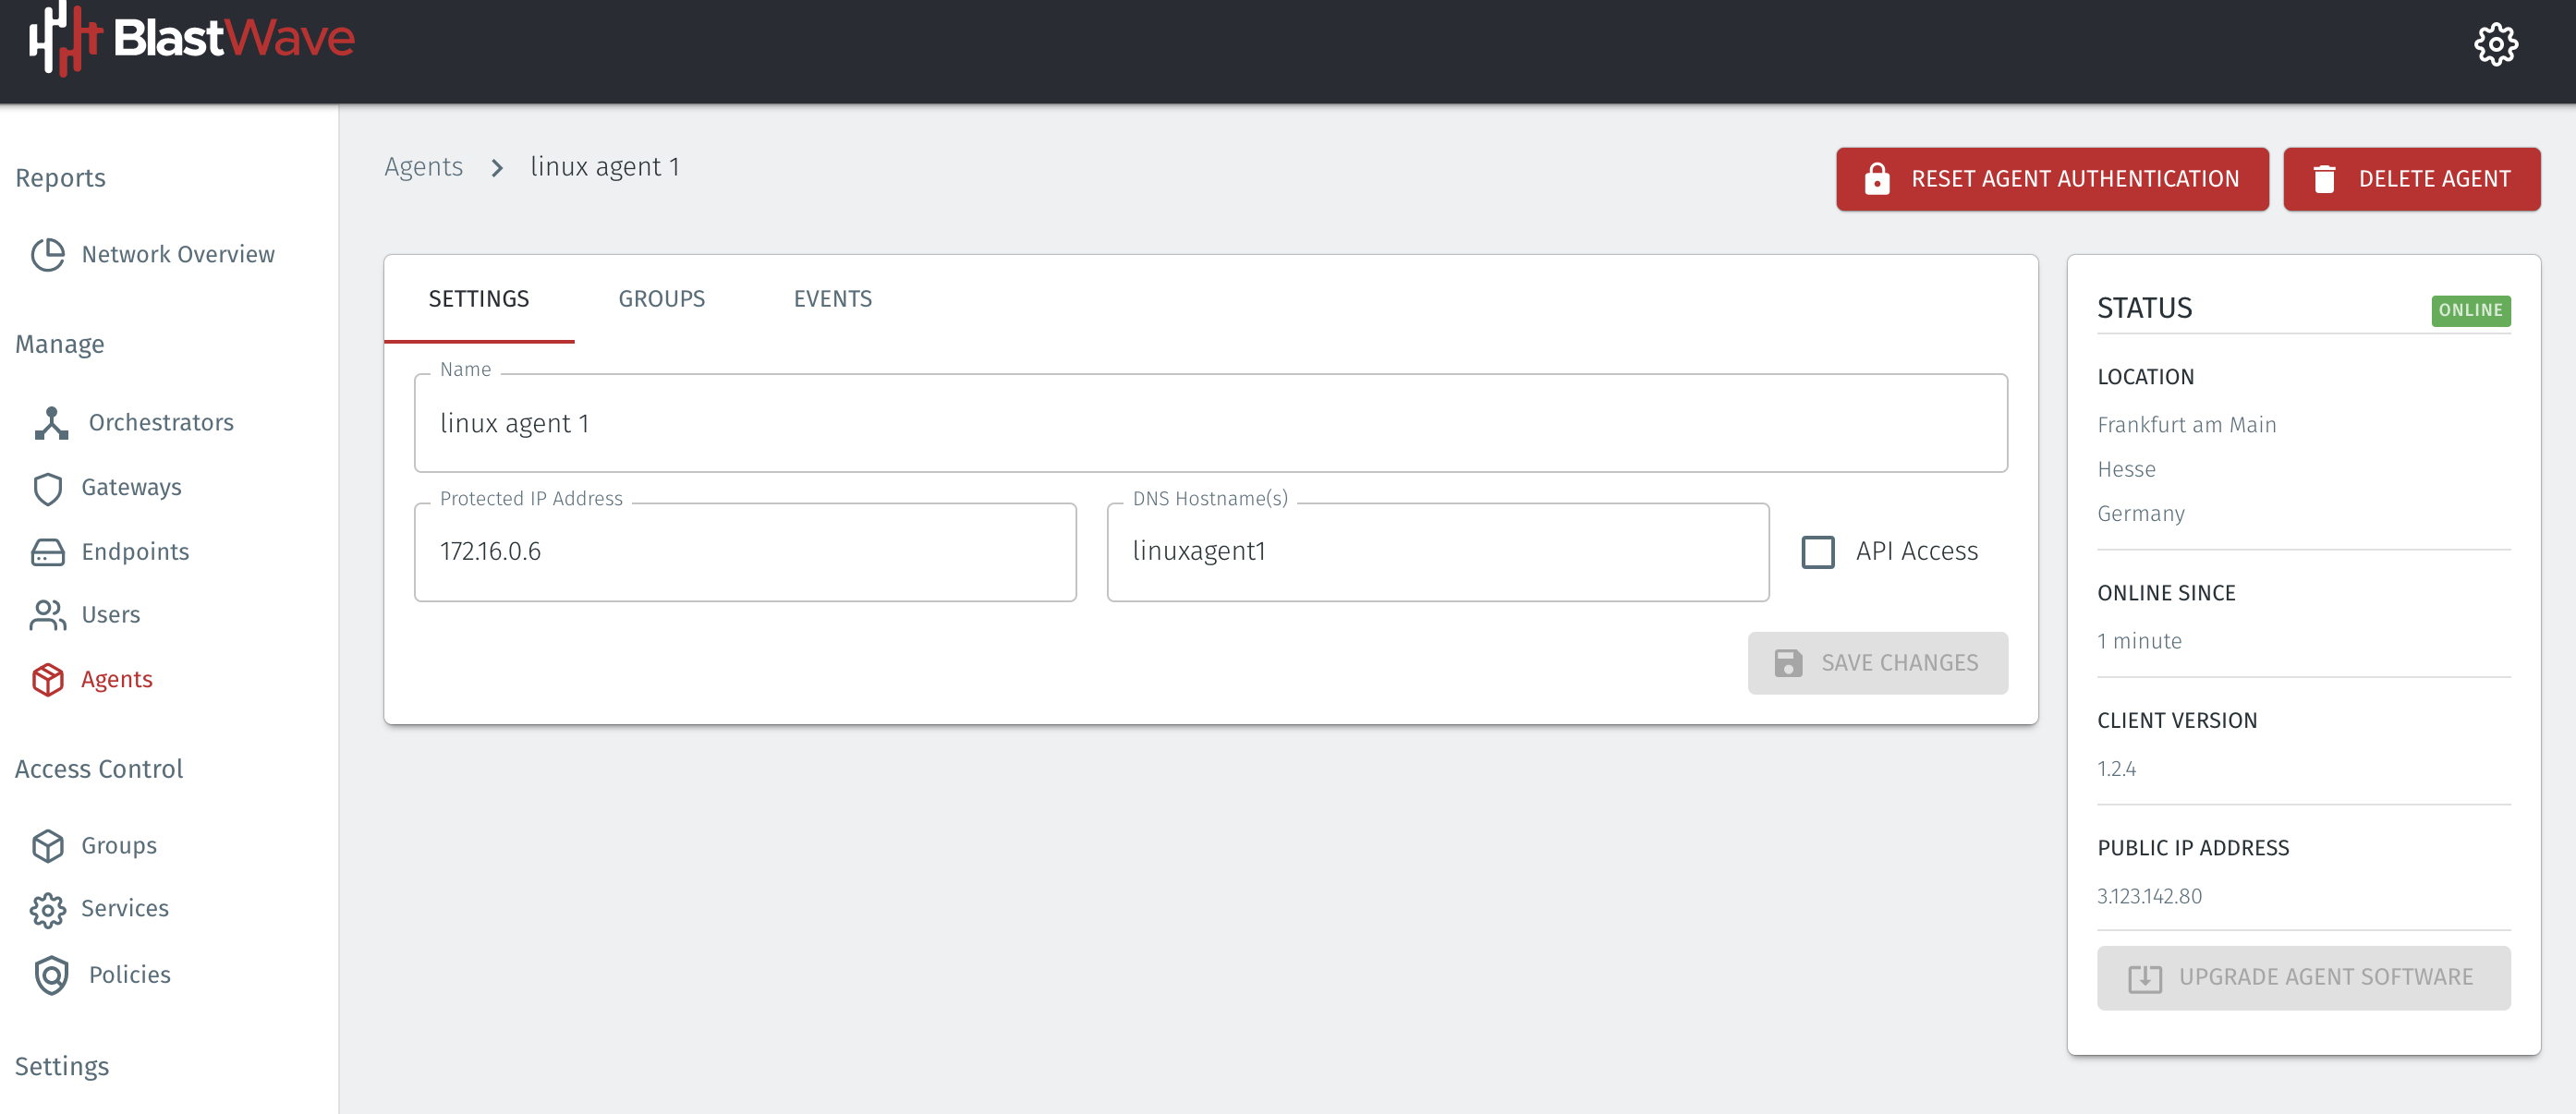
The status of the new Agent should appear as "Online" in the Orchestrator as shown in the image below.
Configure groups and policy to allow access to the Host Agent on the EC2 instance
To allow your users to connect to the protected EC2 instance you must set up groups and a policy. BlastShield™ is a zero-trust solution so the default behaviour is to block access until you apply a Policy.
A group is a logical collection of endpoints, agents and/or users that are grouped together. Groups in BlastShield™ are independent of the underlying network segmentation which gives you flexibility to configuration micro-segmentation without having to rely on complex VLAN configuration.
Groups are connected via policies, which form the foundation for BlastShield™ access control and segmentation management. Policies work using a simple ‘From’ and ‘To’ methodology which links a group of users to a group of Host Agents or Gateway Endpoints.
Here, we will create one group for the AWS EC2 virtual instance and another group for the user and link them with a policy which will allow the user to connect to the EC2 instance. This example shows one member in each group, but you may add multiple members.
To learn how to do this, watch the following video or read the steps below.
Select Groups from the left menu.
Select Add New Group from the Group List.
Enter a name for the new Group.
To add members to the new group, click the Add Members button.
The Add Group Members menu will open.
To add the Host Agent on your EC2 instance to the group, click the Agents dropdown box and select the EC2 instance Host Agent.
Click Add Members to save the members.
Click Save to save the new group.
Select Groups from the left menu.
Select Add New Group from the Group List.
Enter a name for the new Group.
To add members to the new group, click the Add Members button.
The Add Group Members menu will open.
To add users to the group, click the Users dropdown box and select the desired users which you want to add.
Click Add Members to save the members.
Click Save to save the new group.
Repeat for the other nodes which you want to add to the group..
Select Policies from the left menu.
Select"Add New Policy from the Policy List.
Enter a name for the new Policy.
Select the user group you created as the From Group.
Select EC2 instance group you created as the To Group.
Save the new Policy.
Connect to your instance over BlastShield™
Once you have created an access policy you can connect to the EC2 instance over BlastShield™ using the Host Agent IP address or DNS name which you assigned.
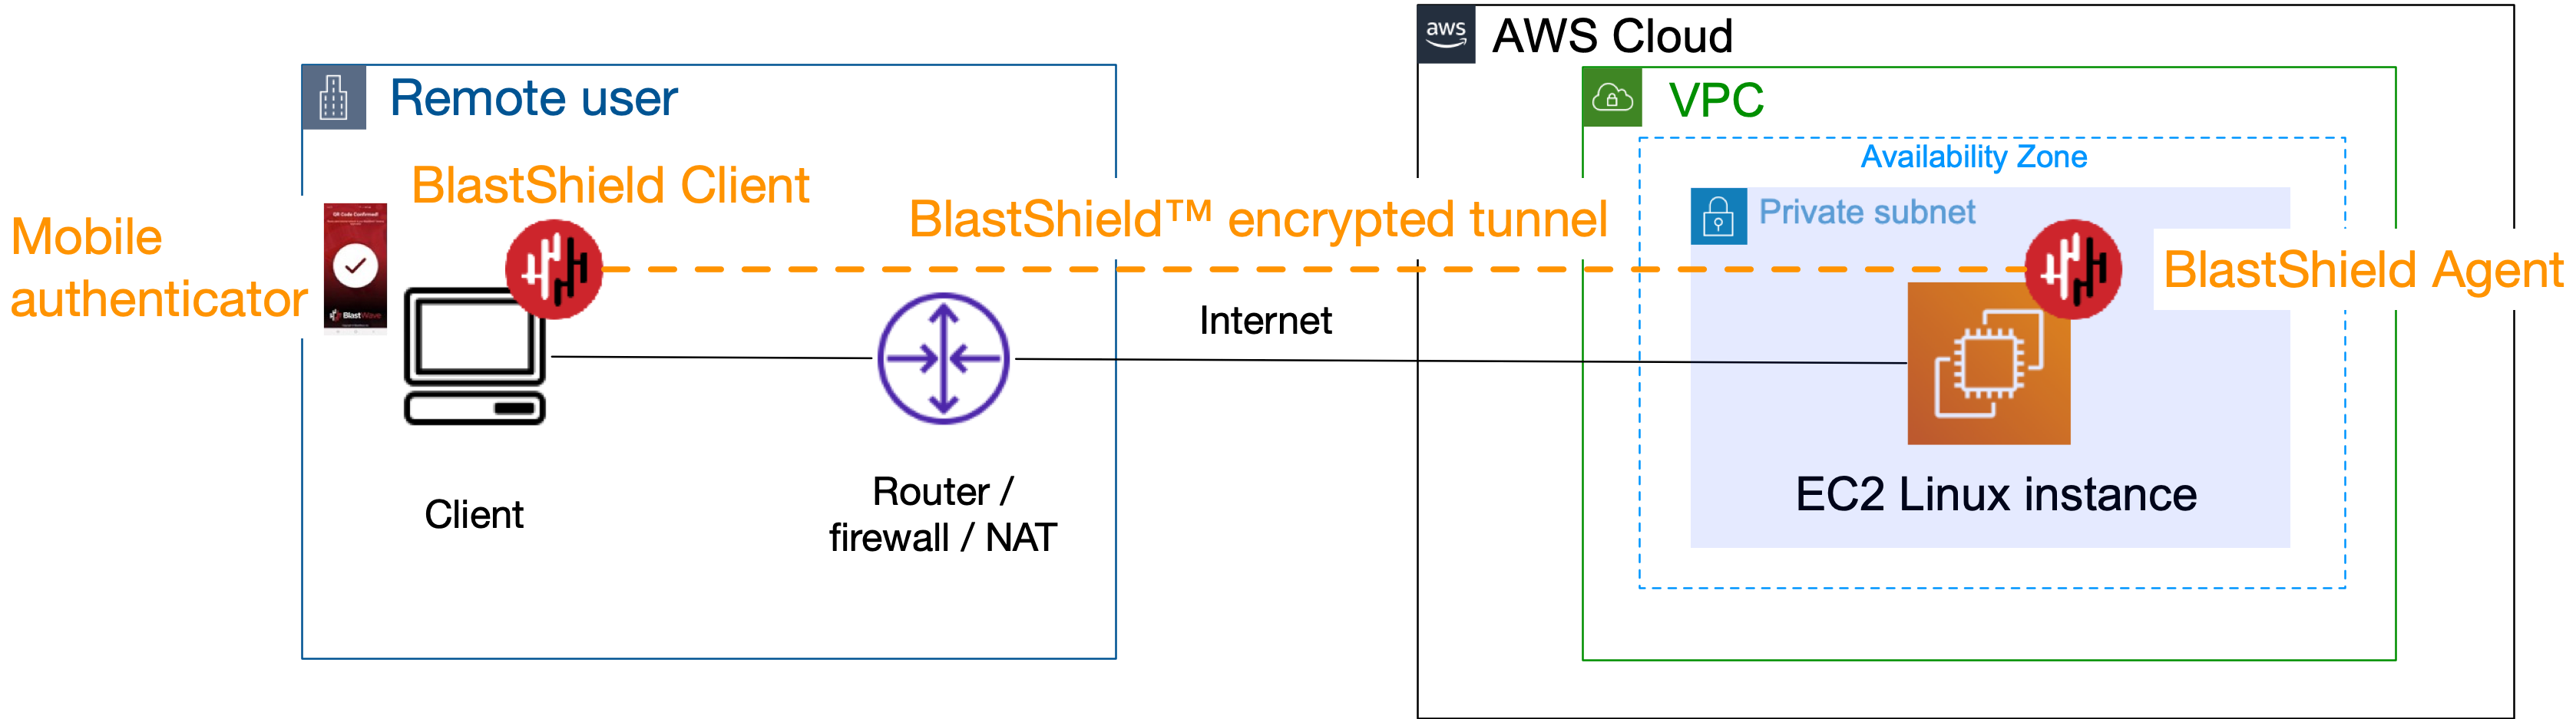
Simply use the Host Agent IP address or DNS name in whichever tool you use to access a remote host.
Note that the DNS name given to the Host Agent will be prepended to the primary DNS suffix configured in the Orchestrator networking configuration. The default DNS suffix is blastshield.io . You can learn how to change the default DNS suffix here
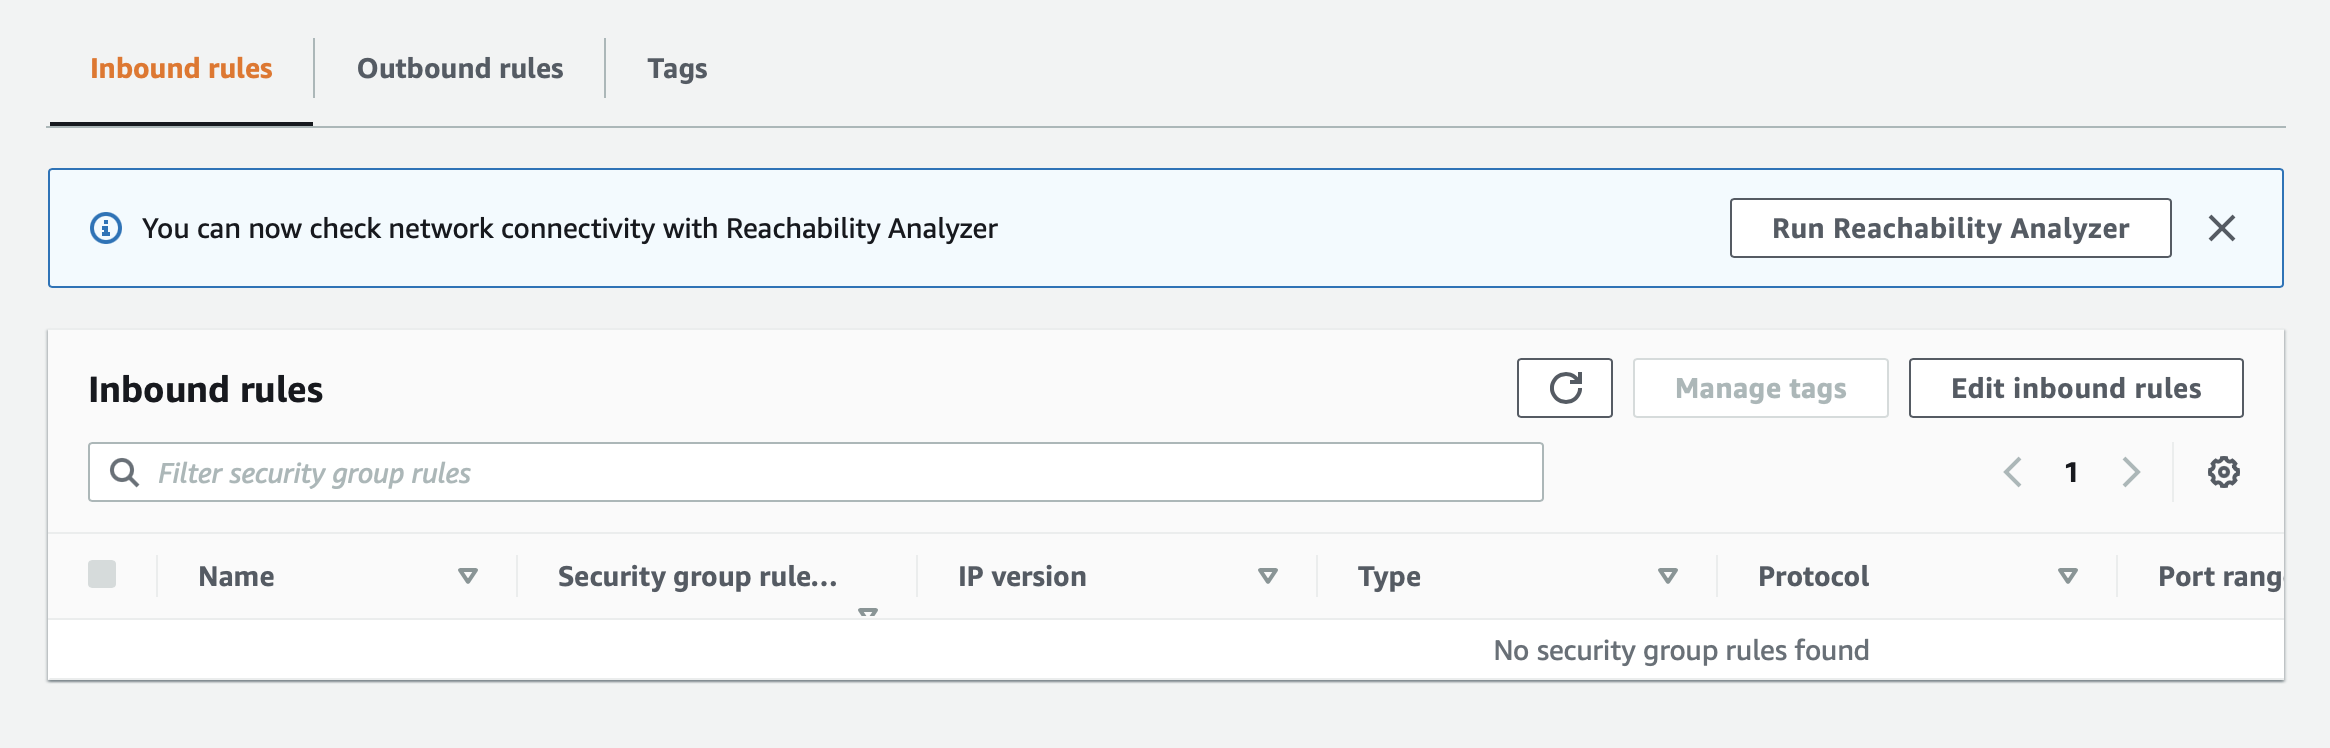
Remove any AWS inbound security group rules for the EC2 instance
BlastShield™ can self-open inbound connections through a firewall to a Host Agent without requiring any open inbound ports. This means that when a Host Agent is deployed on an AWS EC2 instance you do not require any inbound security group rules for BlastShield inbound connections. So you can remove them.
Login to your EC2 console and go to the security groups configuration for your instance.
Select the security group/Edit Inbound rules and delete the inbound rules so that there are no open ports, so that your inbound rules look like the picture below.
It is also possible to add a service to the access policy to restrict the protocols allowed to connect to the instance. To learn more about creating services and adding them to policies, please check out this article.