On-premise installation of the Orchestrator onto a bare-metal x86 appliance in a non air-gapped network.
Introduction
The BlastShield™ Orchestrator is used to provision and manage all systems in a BlastShield™ network. This includes management of gateways, endpoints, remote users, groups, and policies. This article describes how to install a new Orchestrator into a fully air-gapped network. Once installed, you will use the Orchestrator to manage and provision all systems within the BlastShield™ Network.
On premise, non airgapped Orchestrator
Allow outbound access to the
lighthouse.blastwave.iodomain.Allow UDP Port 12345 inbound to the Orchestrator on your firewall.
Resolution of DNS requests must be supported by the network.
On premise, fully airgapped Orchestrator
Allow UDP Port 12345 inbound from the local network to the Orchestrator.
On-premises Orchestrator deployment
In this deployment scenario, the Orchestrator is hosted and managed by the customer. This is typically required in situations where local rules or regulations do not permit the management function to be located externally to the enterprise. The Authentication Server is hosted in BlastWave's secure cloud infrastructure.
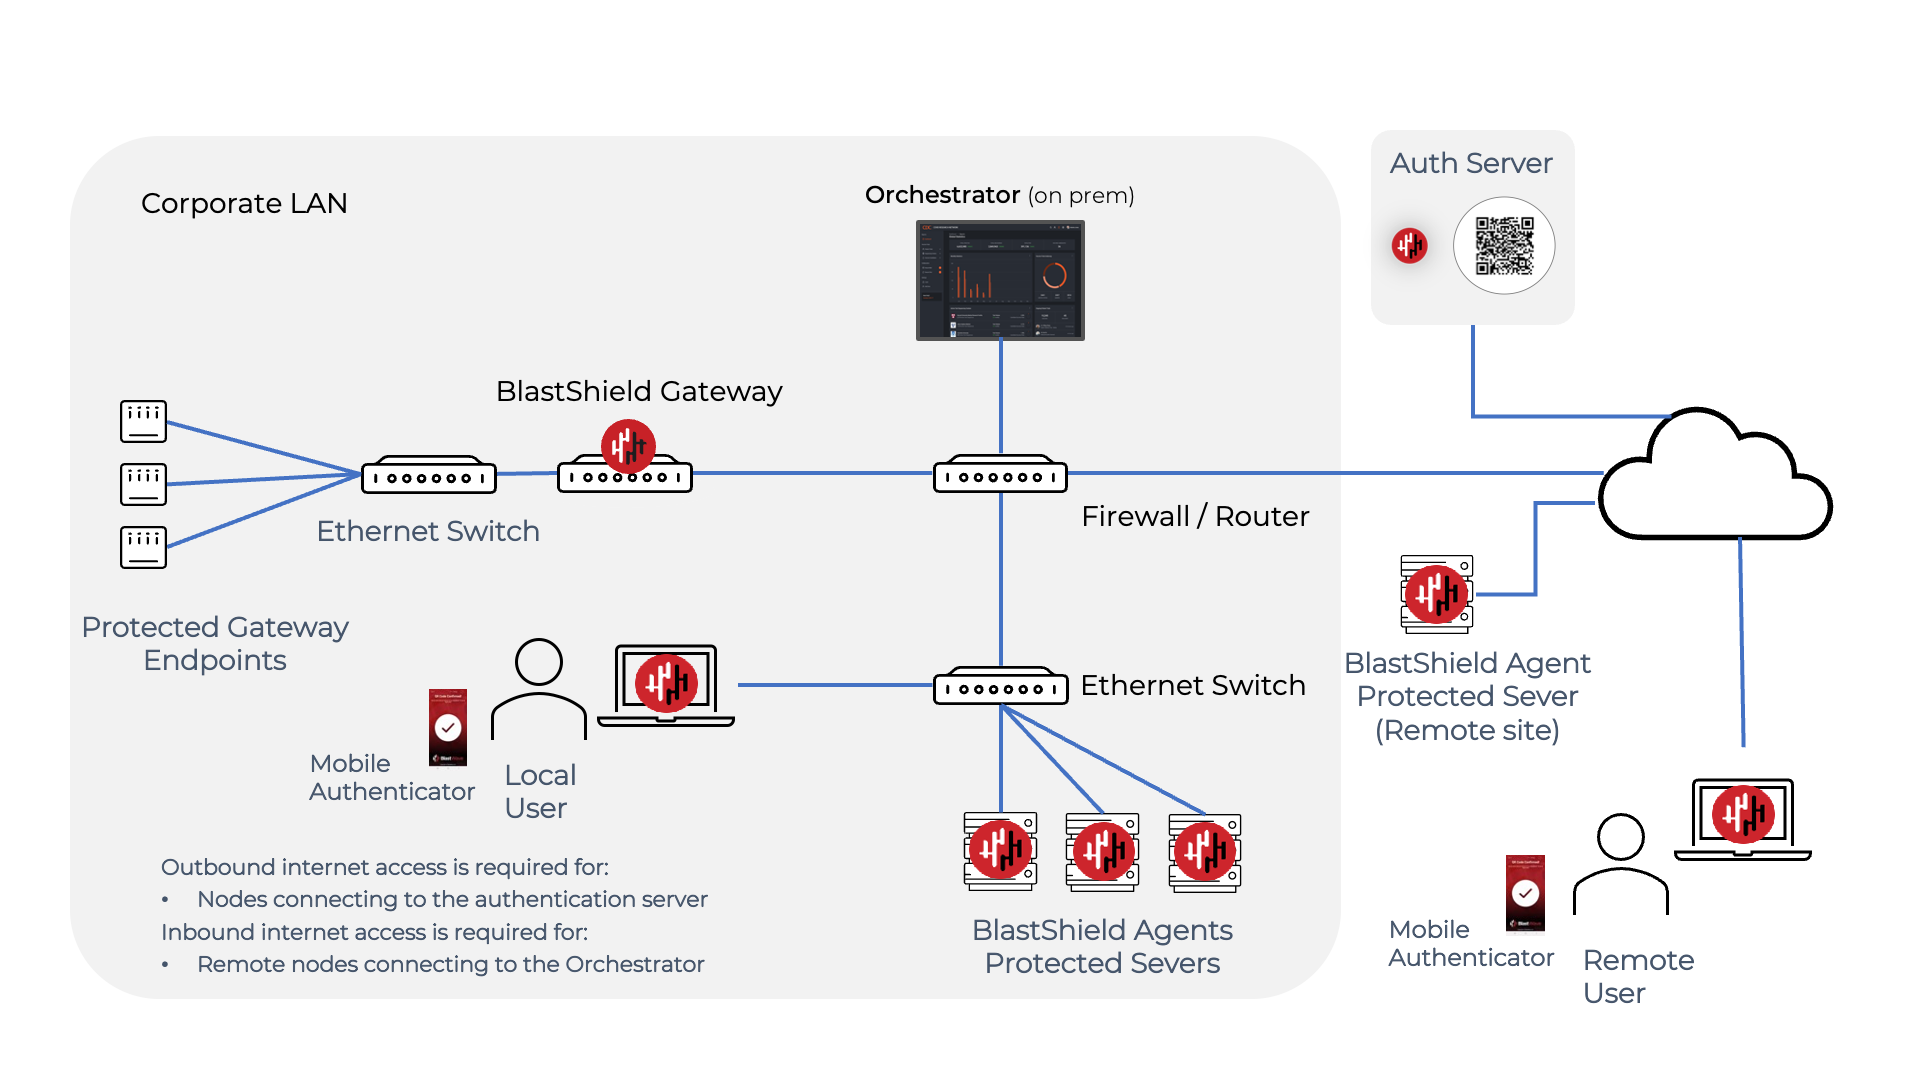
All BlastShield nodes (users, Host Agents and Gateways) must be able to access to the Orchestrator.
Users should be able to access the cloud-hosted Authentication Server from their mobile devices if they wish to use the Blastshield Mobile Authenticator app. If this is not possible then users can authenticate using a FIDO2 key.
Port forwarding must be configured for the Orchestrator.
Request the Orchestrator BSI invitation file and the administrator BSI invitation file from BlastWave. This are used for registering the BlastShield network and for registering the administrator user.
The Orchestrator will use UDP port 12345 for communications. Please forward UDP Port 12345 inbound on the firewall to the Orchestrator.
Install a BlastShield Client on the administrator workstation. You can download the Client from here.
Download the Orchestrator firmware. You can download the Orchestrator firmware here.
Make sure you have a suitable hardware platform on which to install the Orchestrator.
x86 Orchestrator hardware requirements
Parameter | Value |
|---|---|
CPU | Minimum Intel Atom with AES-NI support or Intel Celeron with AES-NI support. Note that more powerful CPUs with AES-NI support such as Core i3 or Xeon are also supported. |
RAM | Minimum 8GB |
HDD/SSD | Minimum 64GB |
NICs | One NIC is required. Most NICs made by Intel, Broadcom and Mellanox are supported. |
Note: a USB interface is required to connect the boot media.
In this step you will be downloading the BlastShield™ Orchestrator Software Installer. Using the Invitation (.bsi) file you received from BlastWave, you will prepare a USB installer to install the software on your x86 platform and bind it to the BlastShield™ Network. Below are the steps to prepare the installation media.
Download the firmware. You can download the Orchestrator firmware here
Unzip the Installer Package (Do NOT run the Installer file).
Write the Installer image to a USB drive using any available image writer
Note: there are several free utilities available for writing images to USB drives. We recommend the balenaEtcher software, but you can use any utility.
Once you have written the image to the USB, copy the Orchestrator BSI invitation file into the root folder of this image on the USB.
Create a file and name it
authorized_keysThis file should contain a SSH public key in one-line OpenSSH format which will be used by the administrator to apply the license to the Orchestrator immediately after installation.
Add the SSH public key to the
authorized_keysfile and copy this file to the root folder of the USB.
Note
The USB should contain the following:
The installer image.
The BSI file.
The
authorized_keysfile.
In this step you will be booting the x86 platform from the USB image created in the previous step.
Connect your x86 platform as shown here and then follow the steps below.
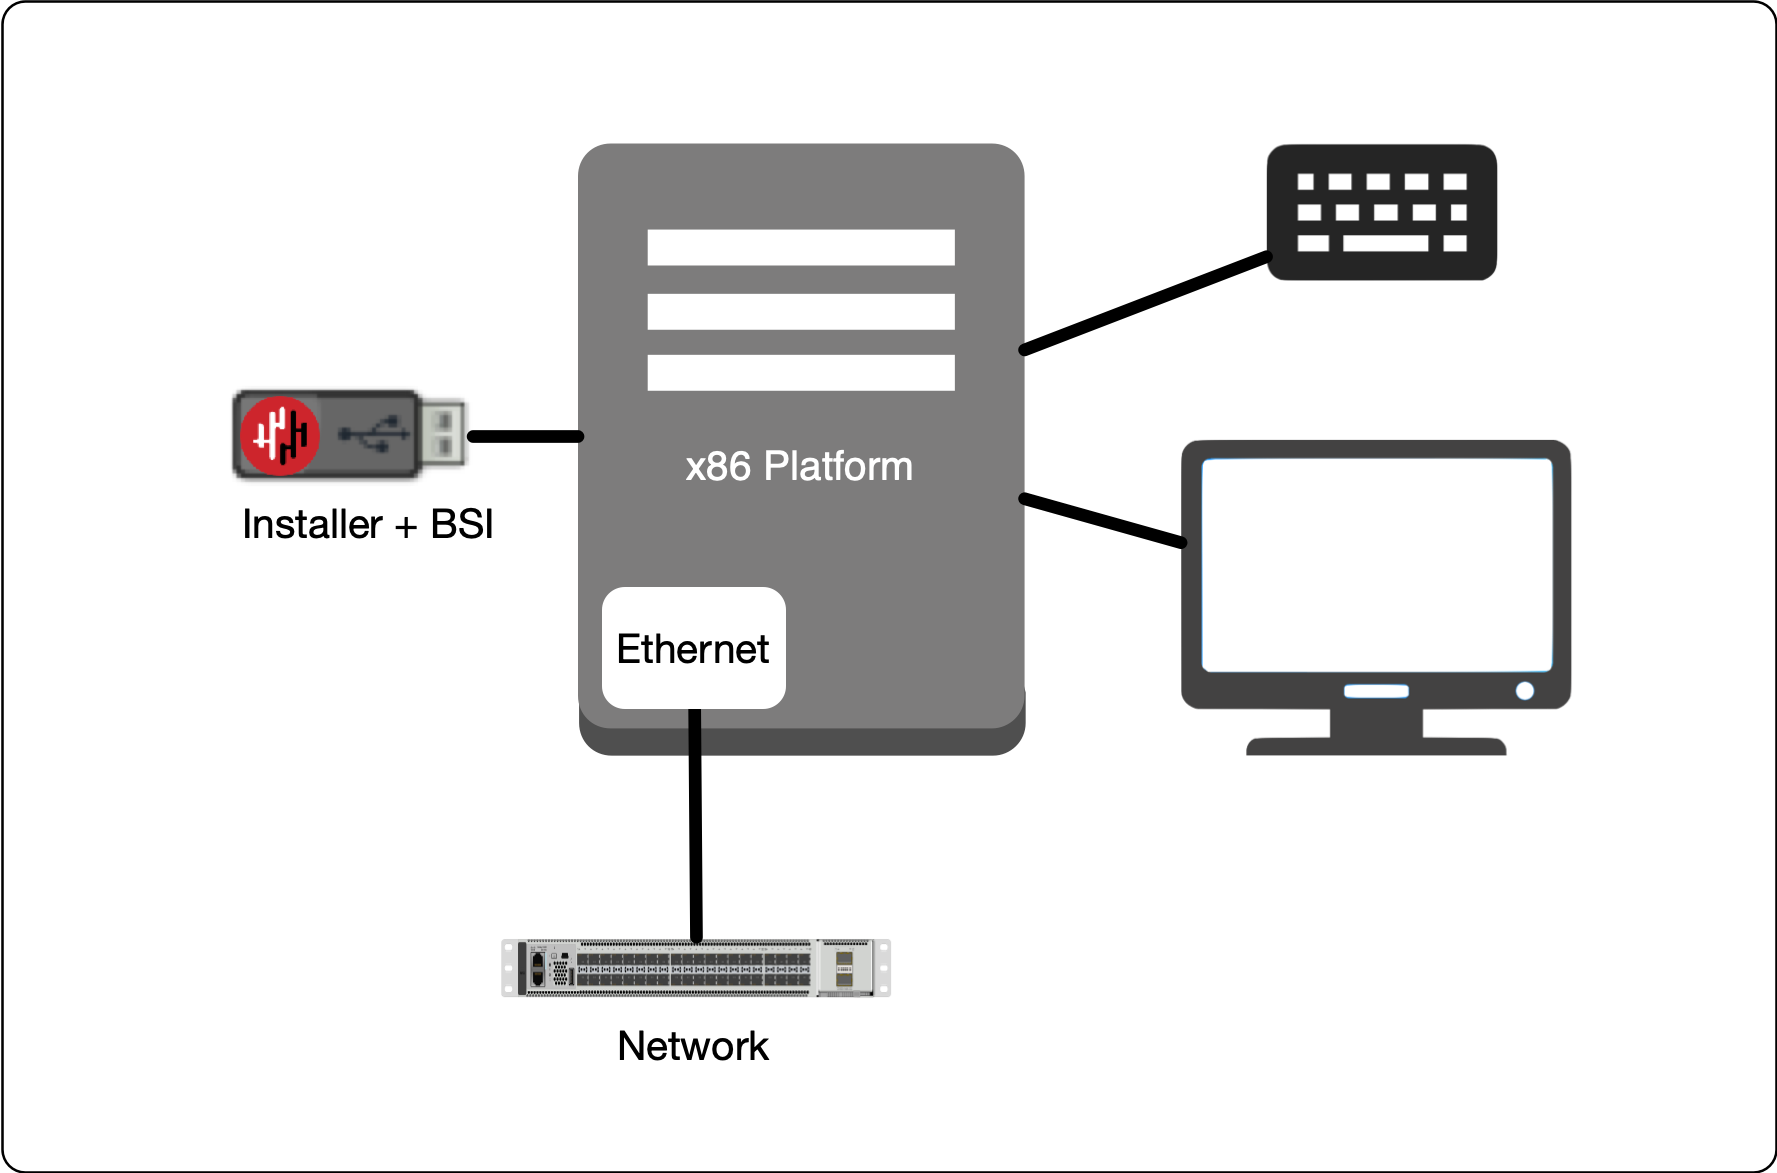 |
Making sure the x86 server is connected as shown above, power it on and exit the boot sequence using the break key that applies to your hardware, then select the boot setup menu. Ensure the USB boot media is connected.
Re-boot your server from the USB image, once the image boots you will begin the setup process.
Select the uplink (network) interface for the Gateway from the displayed list (note that the Orchestrator will not use any endpoint interfaces).
Set the IP address, Default Gateway and DNS server IP address. You can choose manual or DHCP options.
Wait for the network interface to come up.
Select the invitation (.bsi) file.
Select the target device (hard drive).
Confirm that all data will be erased and the image will be installed on the server.
When the installation is complete you will be prompted to remove the USB media and the server will re-boot.
Remove the USB.
Click on OK
The VM will gracefully restart.
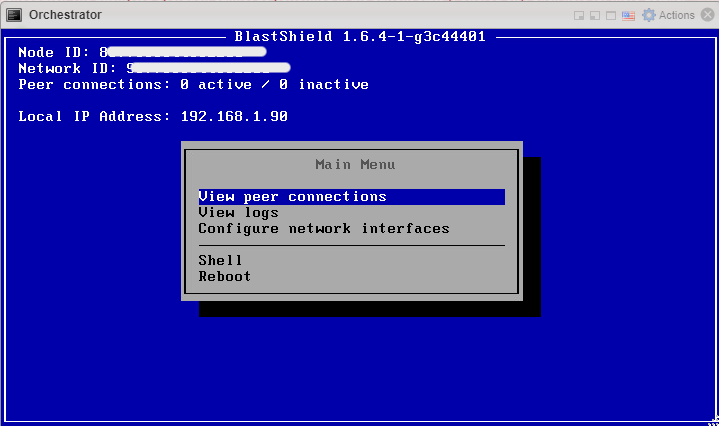
Once the Orchestrator has started, you will see the local maintenance interface displayed on the console. The local IP address of the Orchestrator is displayed. It is not required to log in to this interface.
Forward UDP Port 12345 inbound on the firewall to the Orchestrator.
To connect to the Orchestrator UI, follow the steps below.
Here you will use the administrator BSI invitation file or invitation link which you received from BlastWave to register and connect to the Orchestrator as the administrator user.
If you are using the Mobile Authenticator app and you have received an administrator invitation (BSI) file then follow this process to register: Register the administrator user using an administrator (BSI) invitation file
If you are using the Mobile Authenticator app and you have received an administrator invitation URL then follow this process to register: Register the administrator user using a registraton URL.
You can download the Mobile Authenticator app here: Mobile Authenticator download links
You can download the Desktop Client here: Desktop Client download links
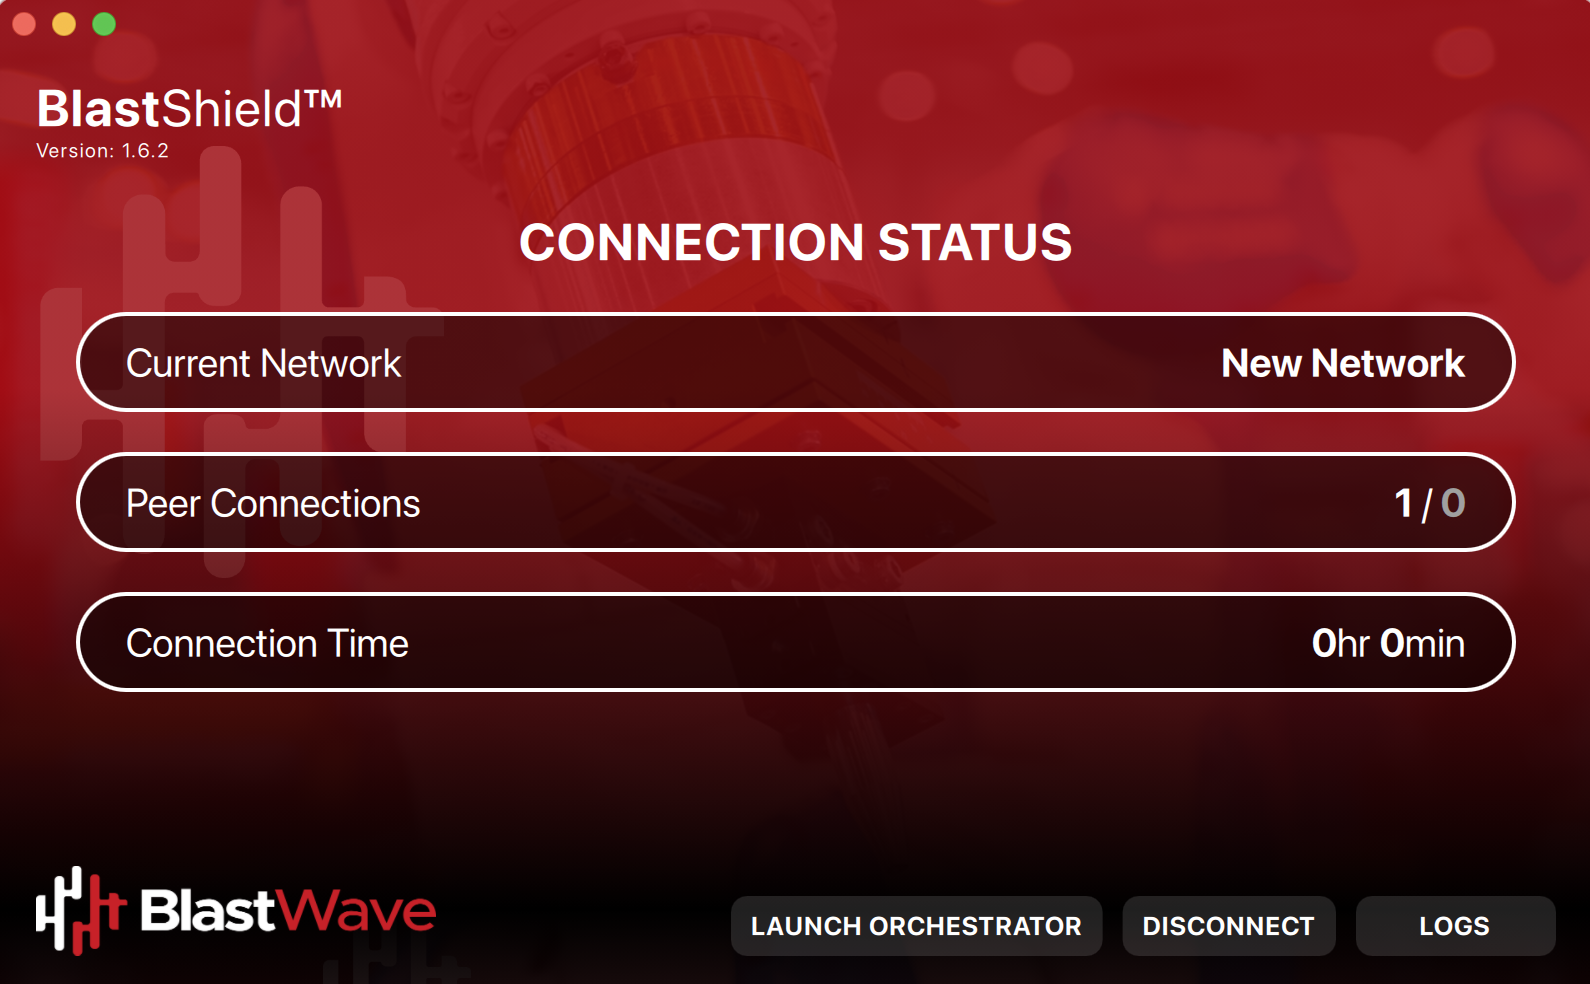
Go to the BlastShield™ Desktop Client on your computer and ensure the Connection Status shows that it is connected.
On the BlastShield™ Client, click on the Launch Orchestrator button.
Scan the displayed QR code with the BlastShield™ Mobile Authenticator App on your mobile device. Alternatively, if you are using a FIDO2 key instead of the Mobile authenticator app, then interact with you FIDO2 key when prompted.

Verify your facial or biometric identity on your mobile device if you are using the Mobile Authenticator app.
The Orchestrator administration user interface will open in your default web browser. At this stage the UI web server will be using a self-signed certificate for HTTPS, so you should acknowledge the browser security warning.
Now that you have installed and connected to the Orchestrator, you can add Host Agents, Gateways and new users. Please refer to the following sections to learn how to do this.