How to set up secure remote access to Docker containers using the Host Agent
This guide will explain how to use a BlastShield™ Host Agent to provide secure remote access to a host running Docker containers. The Host Agent will provide secure access with end-to-end encryption and multi-factor authentication of users. Creating security profiles with BlastShield micro-segmentation is simple and may be quickly configured and the risk of errors is minimal due to the common provisioning and simple tasks. Deploying across multiple platforms is easy as BlastShield™ is an overlay solution.
Introduction
Docker is now widely used by software engineers and DevOps teams because it speeds up software development and simplifies the packaging and distribution of applications. It's rapidly becoming the standard for organizations to deploy services in their environment. It is up to the Docker administrator to secure the access to the docker host. Because containers are typically short lived, DevOps teams often don't have the time to properly secure them, but this can become a security risk. BlastShield™ is very suitable for securing such workloads, since it is very convenient and fast to setup a BlastShield™ Host Agent and then securely share access with multiple users using the built-in MFA for authentication and BlastShield's powerful micro-segmentation to isolate protected resources.
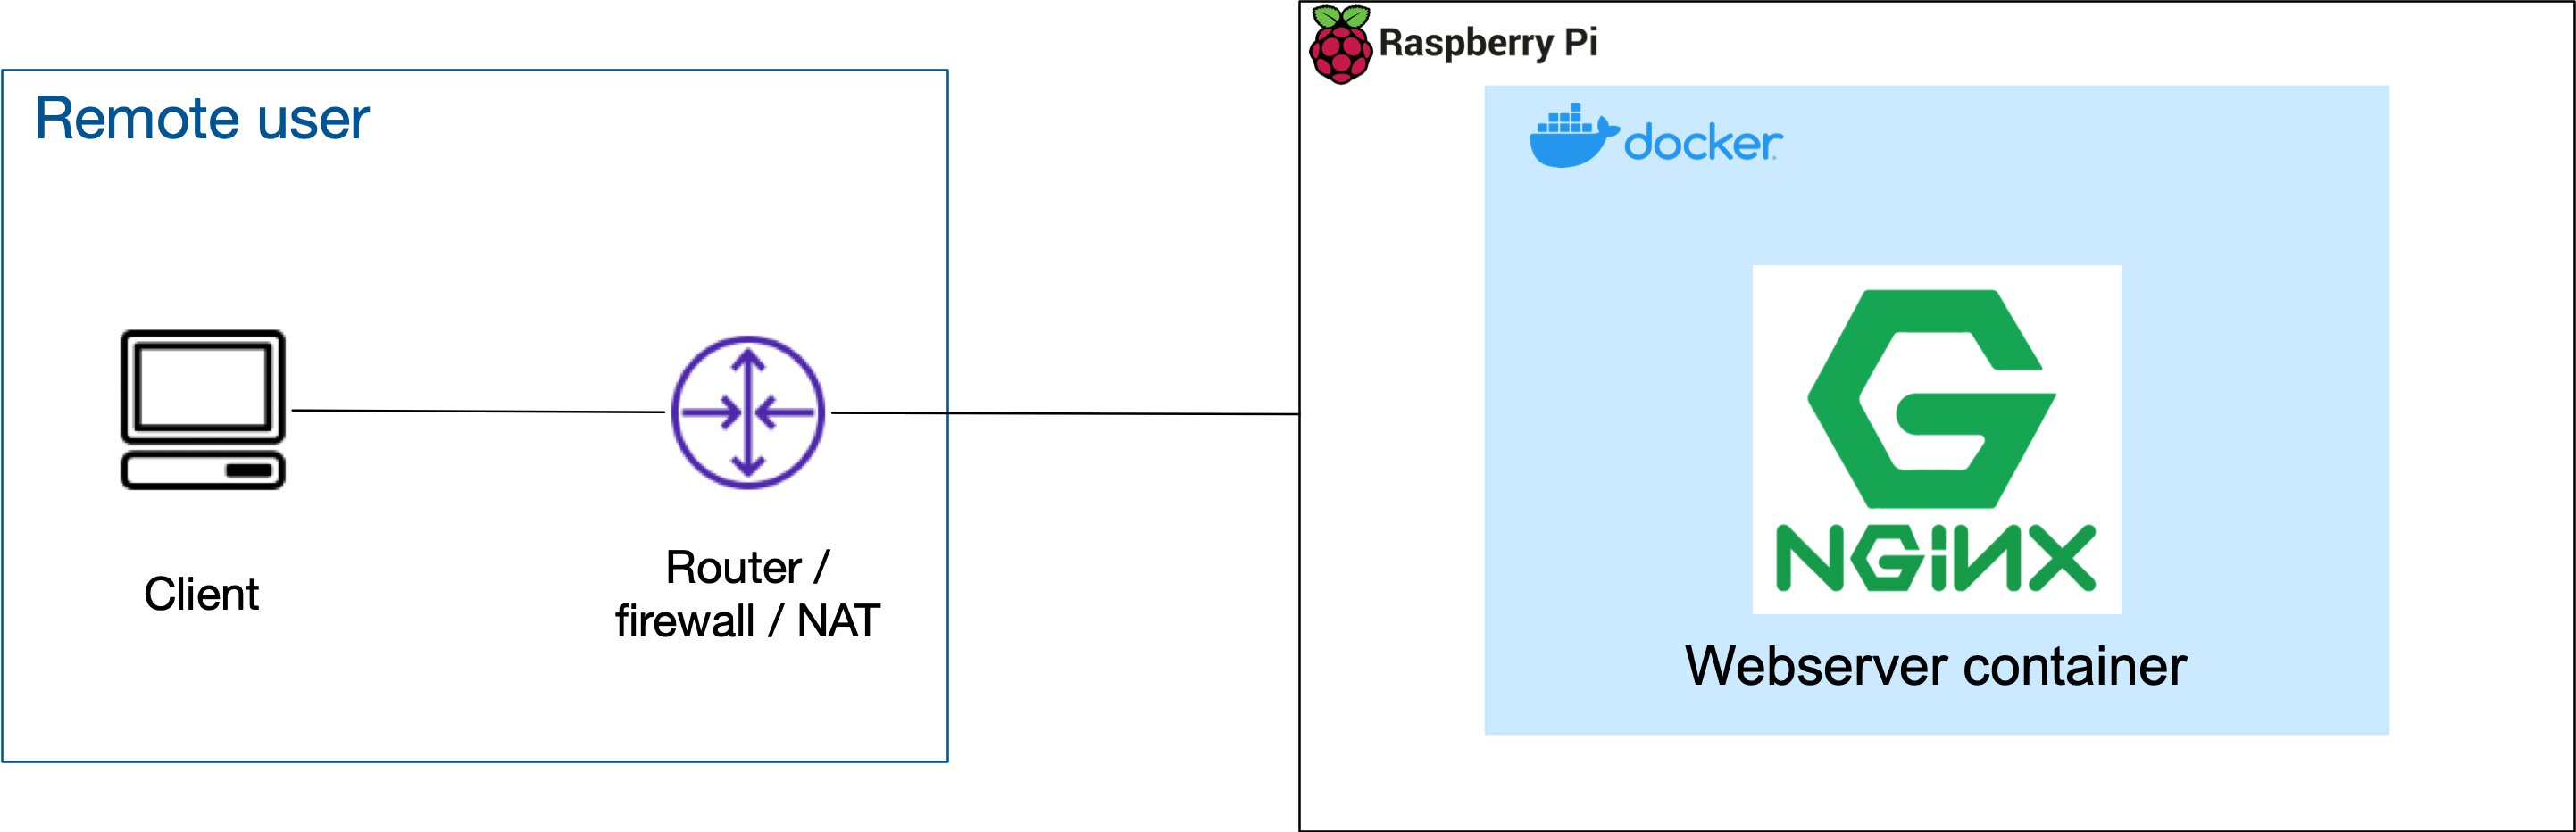
In this example, Docker is installed on a Raspberry Pi host and the BlastShield™ Host Agent is installed on the Pi to provide secure remote access to the Docker containers. The Raspberry Pi is a low-cost, credit card-sized, single-board computer that runs Linux and uses an ARM processor. Docker is available to run on the Pi, making it a low-cost platform for development work.
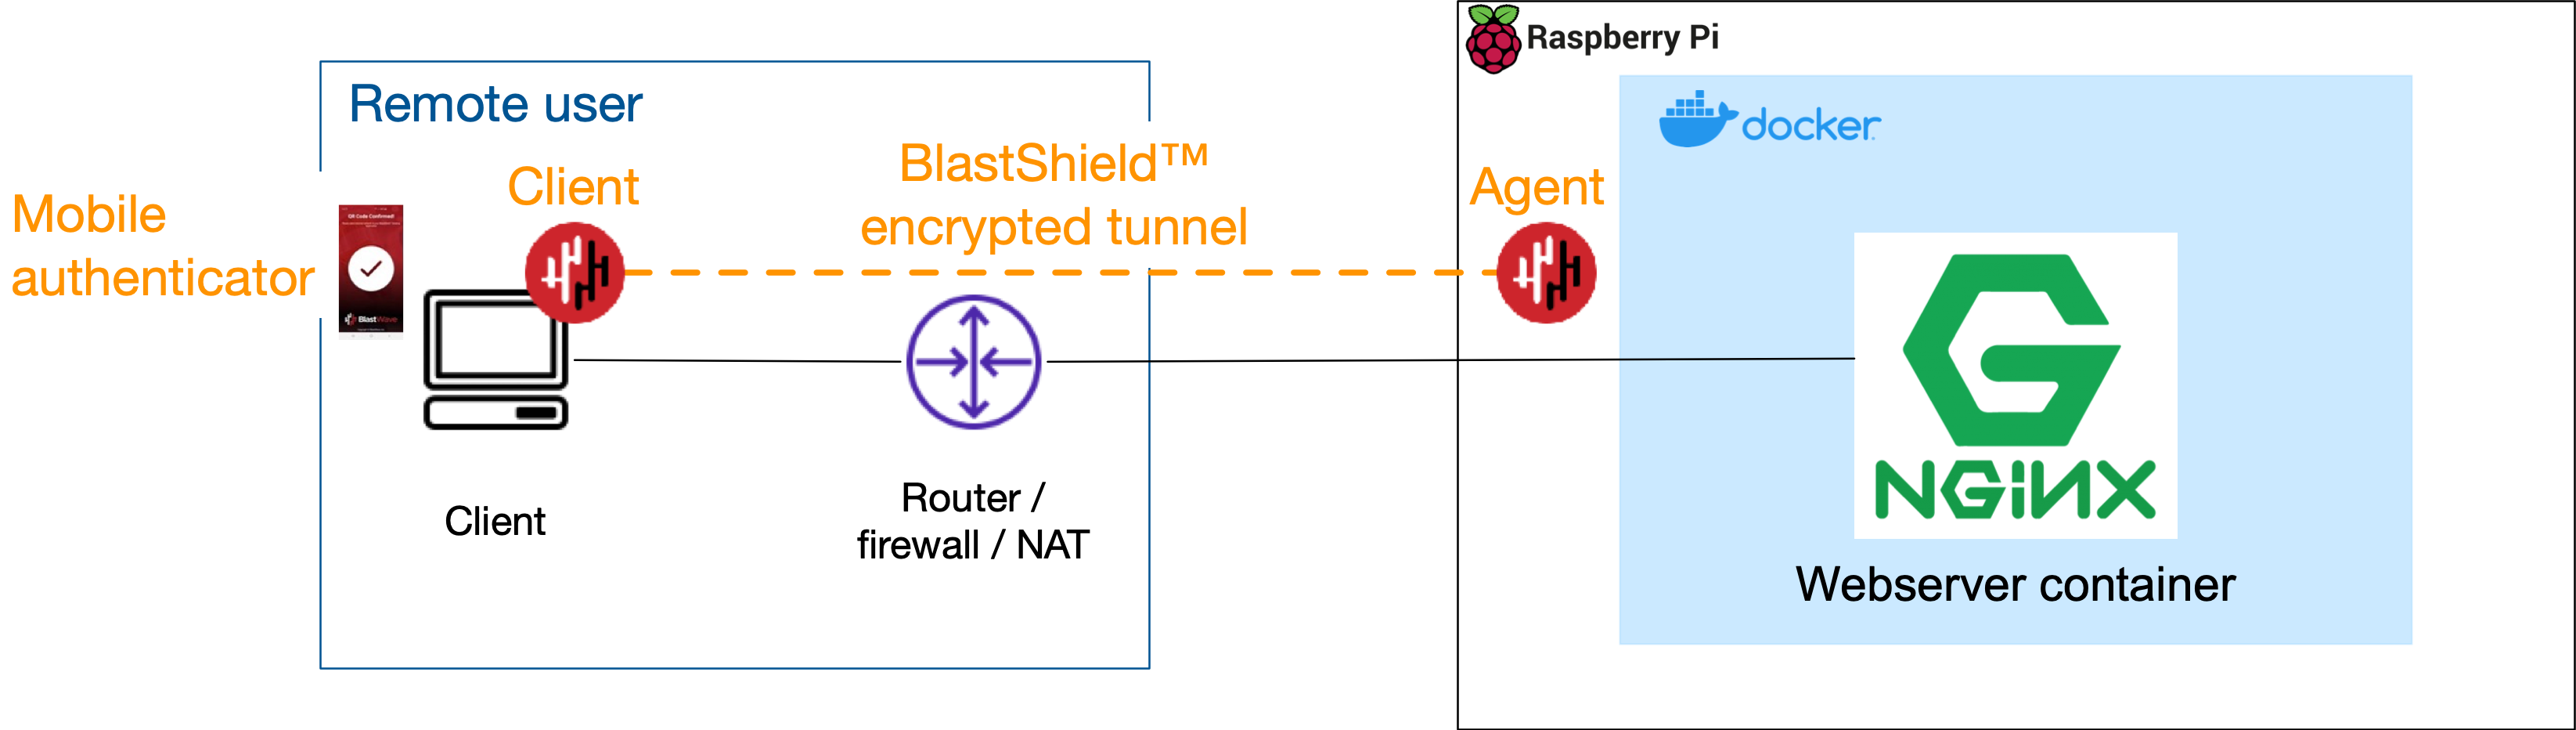
Once the BlastShield™ Host Agent has been installed on the Raspberry Pi, it will connect the host to the BlastShield™ peer-to-peer encrypted overlay, and will control access to the host where access authorization is configured using zero-trust principles. Authorized connections must be whitelisted by creating access policies to explicitly allow them. To connect, a user must first authenticate via the BlastShield™ mobile authenticator app, which uses passwordless multi-factor authentication. This reduces the time it taken to set up remote access, reduce the risk of credential theft, and make it easy to share access with a defined group of remote users.
Prerequisites
A host for the Docker installation. This example uses a Raspberry Pi model 4B.
Connection to a BlastShield™ Orchestrator.
Docker should be installed on the Raspberry Pi. I used the Docker installation script to install Docker on the Raspberry Pi.
An ARM-compatible Docker image to run on the Raspberry Pi, such as the Nginx official image.
Setup
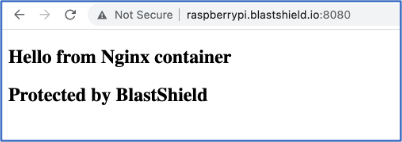
Setting up with BlastShield is very quick, and you should be able to get connectivity working in about 5 minutes. Before you start, your connection to the container should look like the figure below.
Add a new Agent in the Orchestrator
Click on "Agents" in the "Manage" menu in the the left sidebar, and then click the red "Add New Agent" button at the top right.
The New Agent dialogue opens. Add a name for the Agent and a DNS Hostname. The DNS Hostname is optional and can be used to identify the Agent in the BlastShield™ network as BlastShield runs its own DNS.
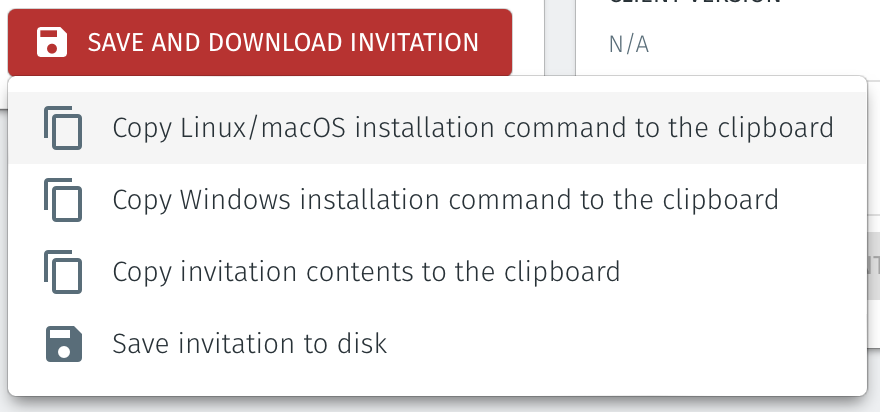
Then click on the red "Save and Download Invitation" button and choose the option for "Save and copy Linux/macOS installation command to the clipboard". Click on that option to copy the command.
Install and register the Agent
Open a terminal session on the host where you are going to install the Agent.
Paste the command you just copied to the terminal and hit enter. This will start the software download.
The software will automatically install and run. The Agent will then automatically register with the Orchestrator. When the process has completed you will see the following message in the terminal window:
Installation successful, the agent IP address is <Agent IP address>
Check the status of the Agent
Now that the installation and registration processes have completed, your Agent is up and running.
You can check the status of the Agent by typing the following:
sudo systemctl status blastshield
The logs may be viewed as follows:
sudo journalctl -u blastshield.service
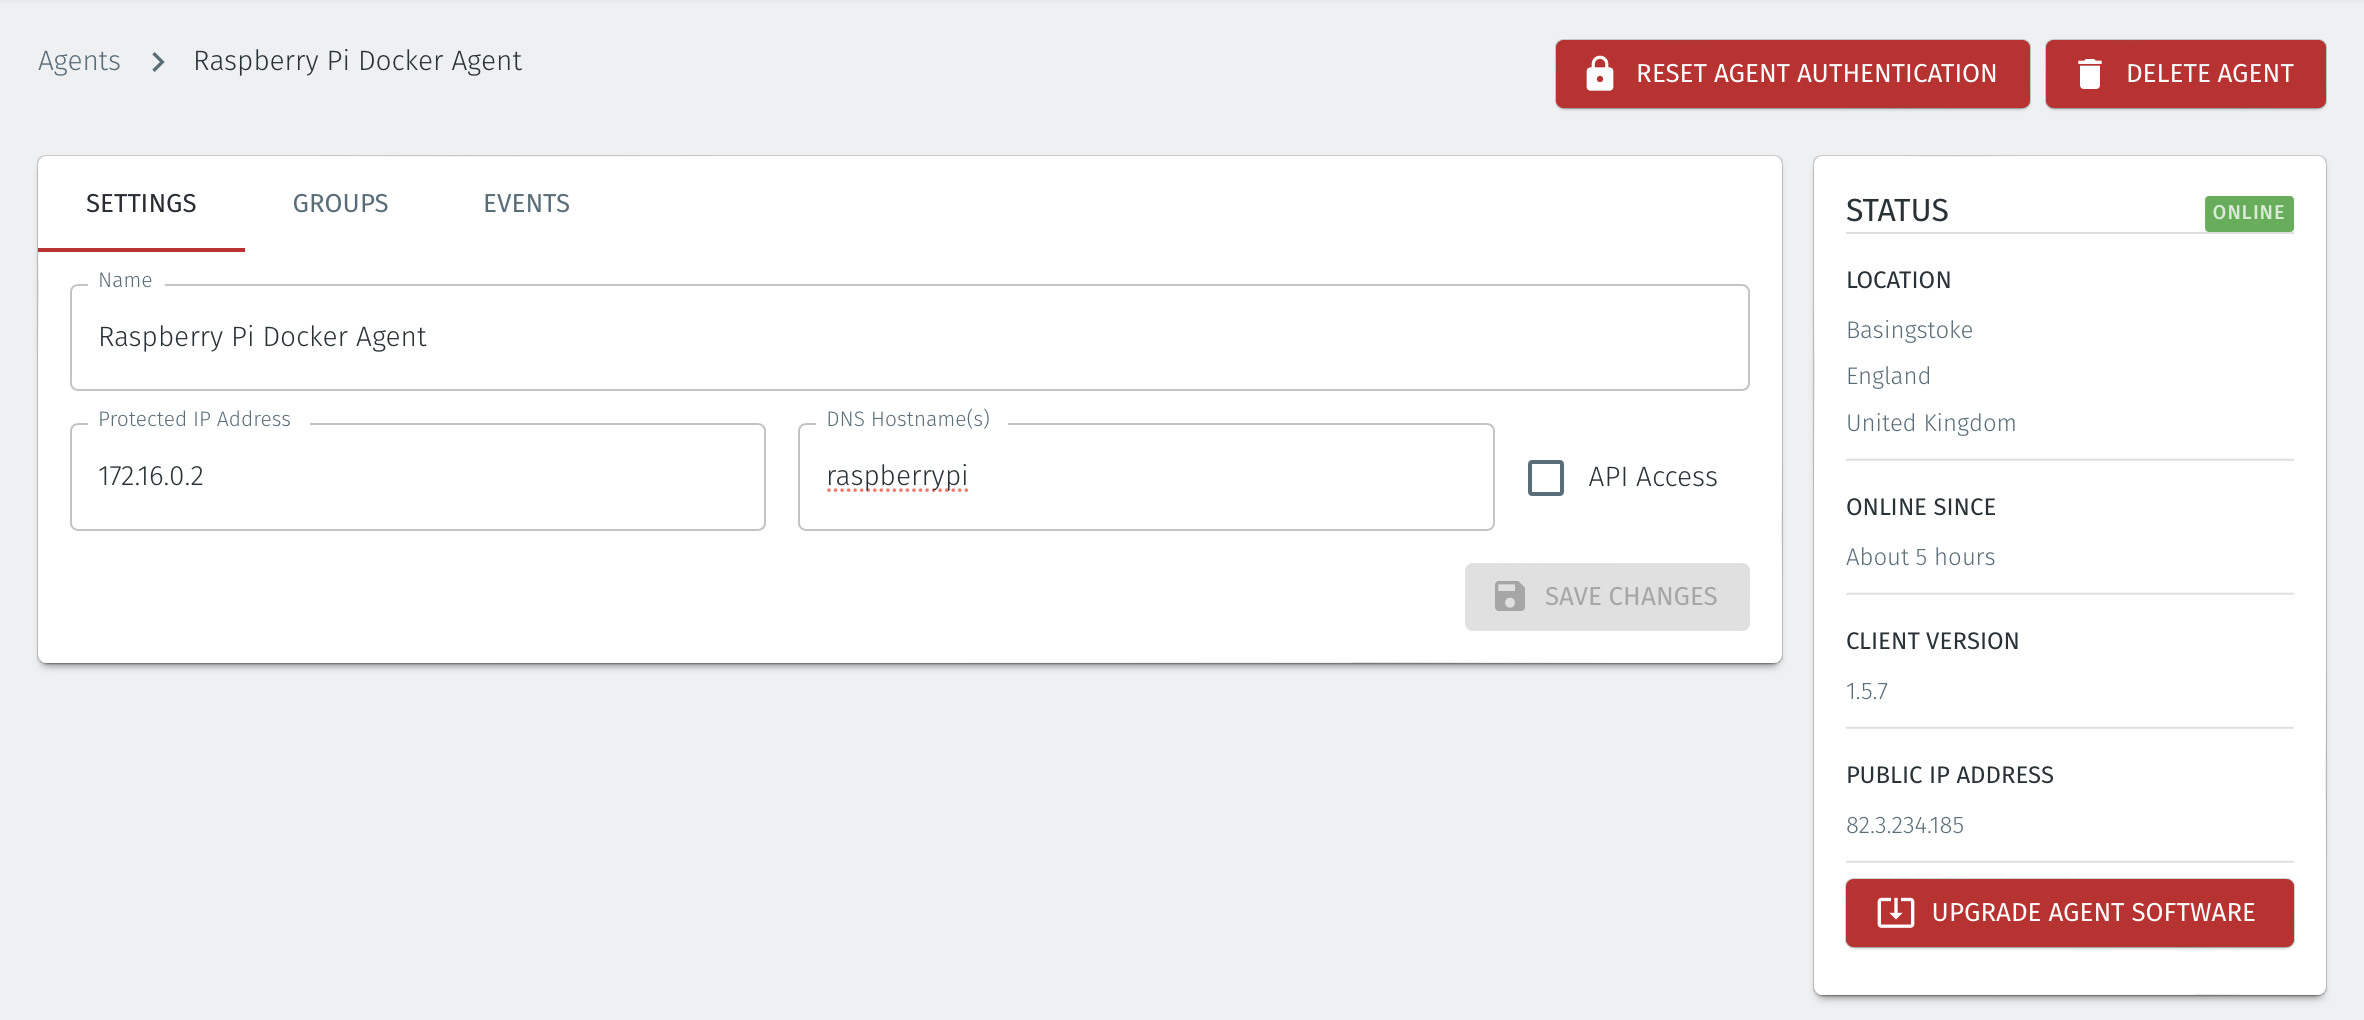
The status of the new Agent should appear as "Online" in the Orchestrator as shown in the image below.
Configure groups and policy to allow access to the Host Agent on the Docker host
To allow your users to connect to the Docker host you must set up groups and a policy. BlastShield™ is a zero-trust solution so the default behaviour is to block access until you apply a Policy.
A group is a logical collection of endpoints, agents and/or users that are grouped together. Groups in BlastShield™ are independent of the underlying network segmentation which gives you flexibility to configuration micro-segmentation without having to rely on complex VLAN configuration.
Groups are connected via policies, which form the foundation for BlastShield™ access control and segmentation management. Policies work using a simple ‘From’ and ‘To’ methodology which links a group of users to a group of Host Agents or Gateway Endpoints.
Here, we will create one group for the Docker Host and another group for the user and link them with a policy which will allow the user to connect to the host. This example shows one member in each group, but you may add multiple members.
Select Groups from the left menu.
Select Add New Group from the Group List.
Enter a name for the new Group.
To add members to the new group, click the Add Members button.
The Add Group Members menu will open.
To add the Host Agent on your Docker host to the group, click the Agents dropdown box and select the Docker Host Agent.
Click Add Members to save the members.
Click Save to save the new group.
Select Groups from the left menu.
Select Add New Group from the Group List.
Enter a name for the new Group.
To add members to the new group, click the Add Members button.
The Add Group Members menu will open.
To add users to the group, click the Users dropdown box and select the desired users which you want to add.
Click Add Members to save the members.
Click Save to save the new group.
Repeat for the other nodes which you want to add to the group..
Select Policies from the left menu.
Select"Add New Policy from the Policy List.
Enter a name for the new Policy.
Select the user group you created as the From Group.
Select Docker instance group you created as the To Group.
Save the new Policy.
Connect to the host and start a container
Once you have created an access policy you can connect to the Docker host over BlastShield™ using the Host Agent IP address or DNS name which you assigned.
Simply use the Host Agent IP address or DNS name in whichever tool you use to access a remote host.
To connect to the Host Agent on the Docker host, simply SSH to the Host Agent overlay IP address (or to its DNS hostname). You can confirm these in the Host Agent configuration in the Orchestrator. Refer to the Protected IP Address field and the DNS Hostname field (see below).
Note
Note that the DNS name given to the Host Agent will be prepended to the primary DNS suffix configured in the Orchestrator networking configuration. The default DNS suffix is
blastshield.io. You can learn how to change the default DNS suffix here.You can now use the BlastShield Agent to access the container directly. For this example, a simple test index.html file is run with the container using a bind mount and published on port 8080.
docker run -it --rm -d -p 8080:80 --name web -v ~/site-content:/usr/share/nginx/html nginxThe published service will be available on the specified port at the Host Agent's IP address or DNS hostname.
Using services to provide additional control over access
You could also create a service in the Orchestrator to define the port on which you publish a container and then add that service to your access policy. This has the effect of filtering the access policy to allow only packets going to that port number. This means that you can assign policies to containers based on the published port number, allowing you to limit access of particular users only to the containerised applications which you want to share.
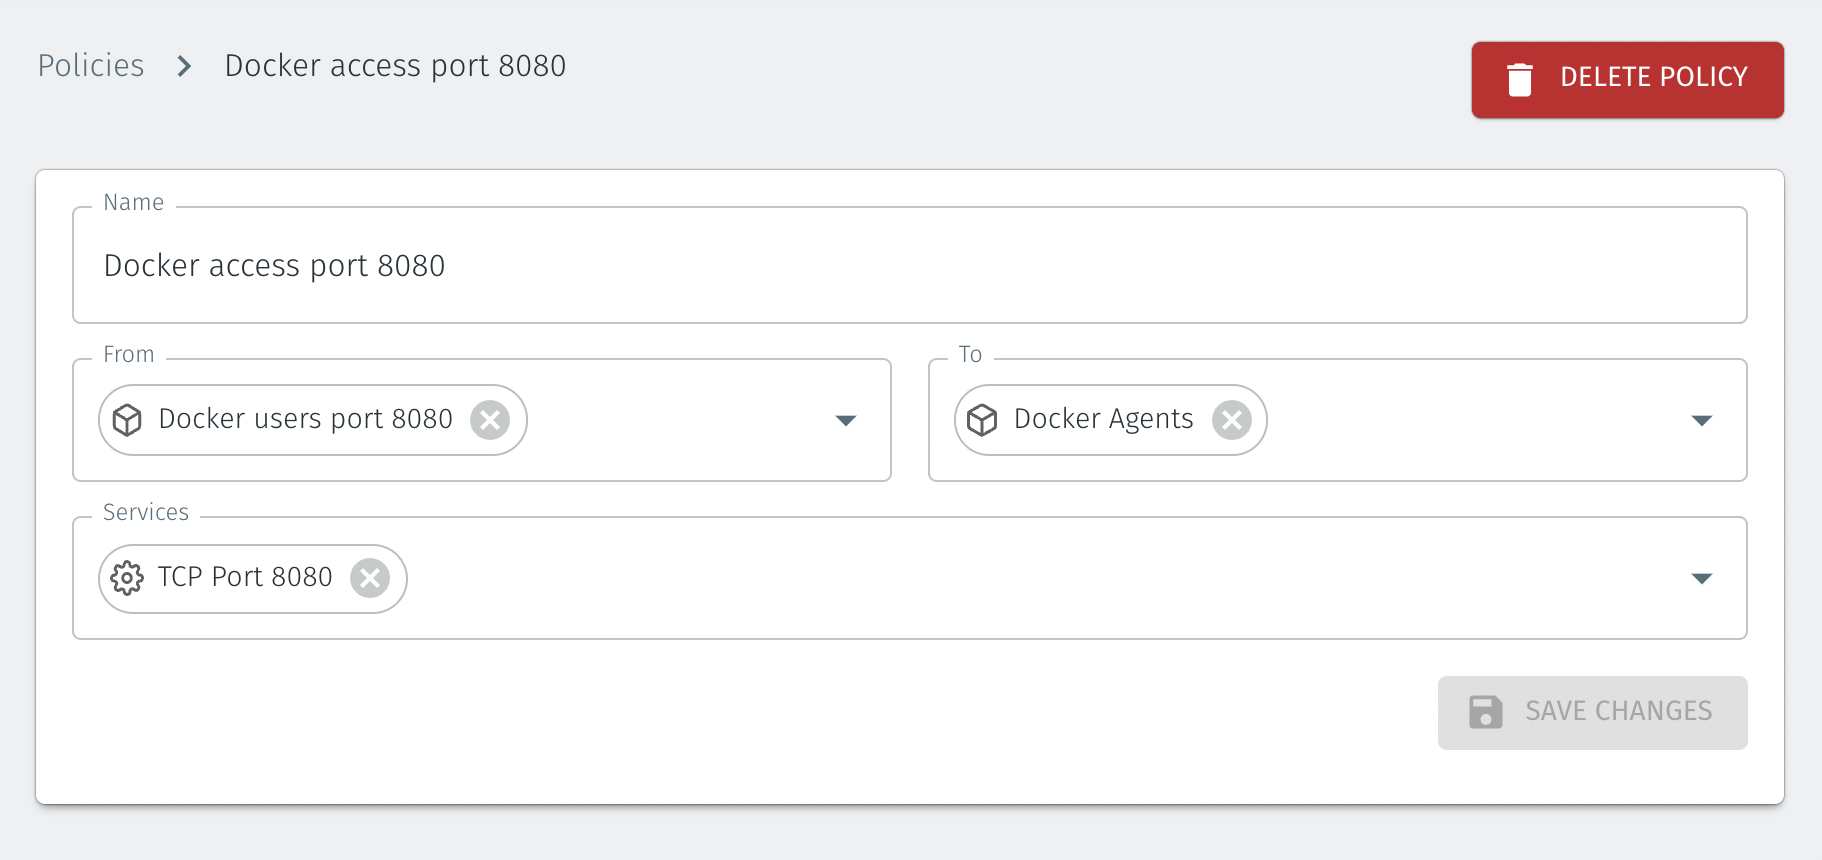
The following policy allows only port 8080, the published port on the Nginx container from the previous example.
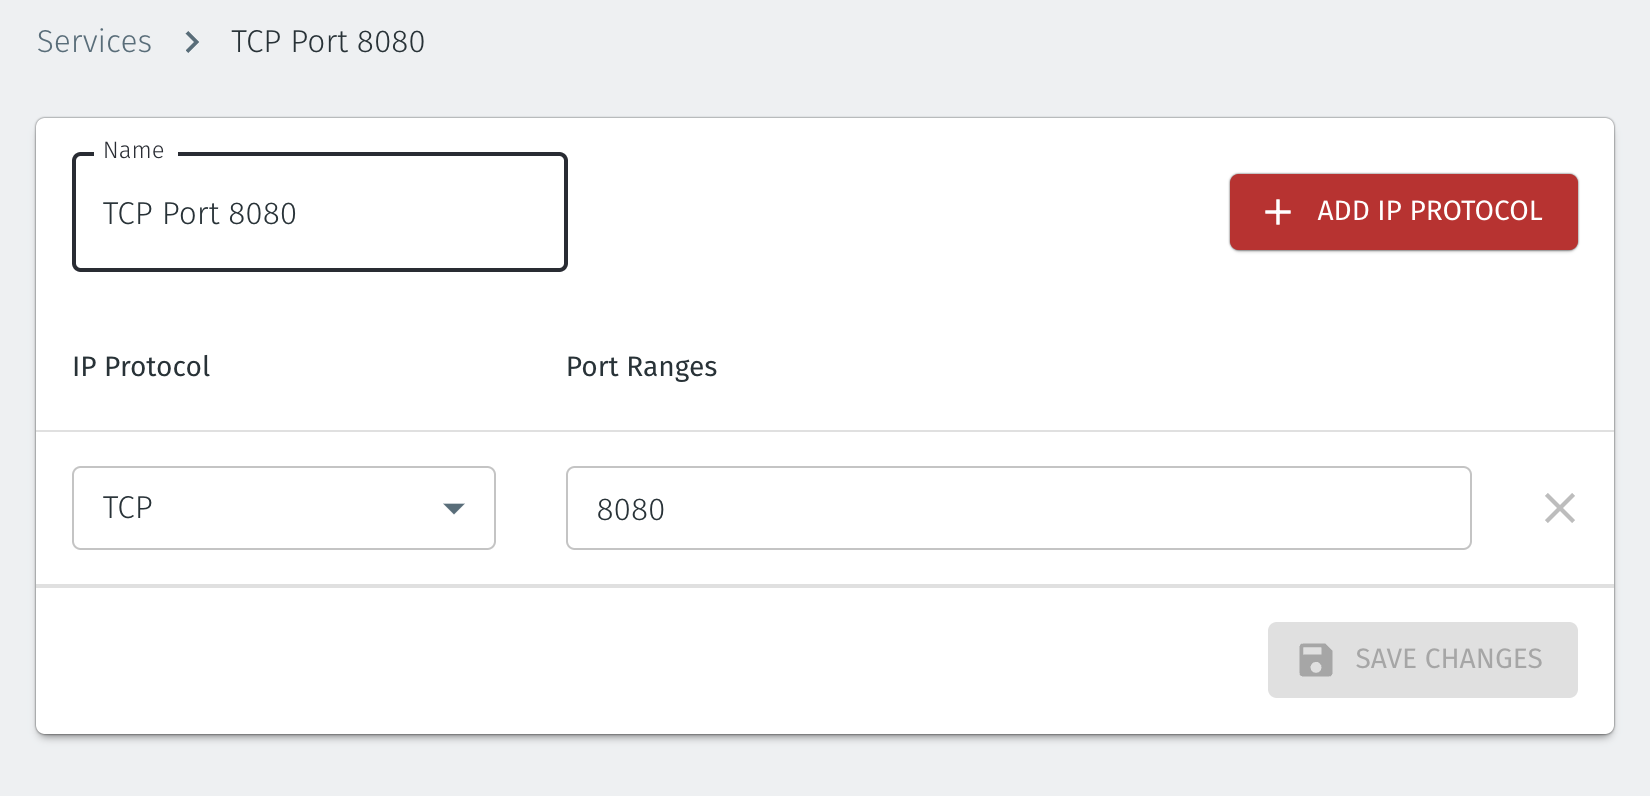
The ‘port 8080’ service is configured by configuring the protocol and port(s) in the Orchestrator, as shown below.
Secure the host firewall to block lateral movement on the LAN (optional)
You can optionally lock down the network interface of the Raspberry Pi so that only the BlastShield interface is used to receive inbound connections. This means that only authenticated and authorized connections are allowed on the Pi, and lateral movement within the LAN is blocked. An example of how to do this using iptables to modify the input and forward chains is shown here. Make sure these rules appear above any Docker rules, and always have a means to locally access your Raspberry Pi when making changes to iptables in case you make a mistake and lock yourself out. The input chain default policy is set to drop with input chain rules to allow connections on the BlastShield™ interface and to allow the related and established connection state. The forward chain has a rule to drop any new connections, not on the BlastShield™ interface.
Caution
Always have the means to locally access your host when making changes to its iptables in case you make a mistake and lock yourself out.
$ sudo iptables -A INPUT -i blastshield -m conntrack --ctstate NEW,ESTABLISHED -j ACCEPT
$ sudo iptables -A INPUT -m conntrack --ctstate RELATED,ESTABLISHED -j ACCEPT
$ sudo iptables -I FORWARD 1 ! -i blastshield -m conntrack --ctstate NEW -j DROP
$ sudo iptables --policy INPUT DROP
Summary
This article explained how to install and configure a Host Agent in a Docker environment to allow secure access to containers. It showed how to create the policies which authorize access to the protected host and described how to access the Host Agent using its protected overlay address. It also described how you can refine a policy using a service to further control access down to the individual port which a container is exposed on.