Migrate a Gateway
You can migrate the endpoints and settings from one Gateway to a new Gateway using the Migrate to new Gateway function.
To learn how to do this, please read the instructions below.
Prerequisites
The Gateway which you are going to migrate from must be operational. Its status in the Orchestrator should be online.
The endpoints on the Gateway which you going to migrate from must be reachable by the Gateway which you are going to migrate to.
The Gateway which you are going to migrate to must be operational. Its status in the Orchestrator should be online.. You do not need to pre-provision any endpoints or settings for this Gateway in the Orchestrator, because they will be migrated across from the other Gateway, but the endpoints must be physically reachable.
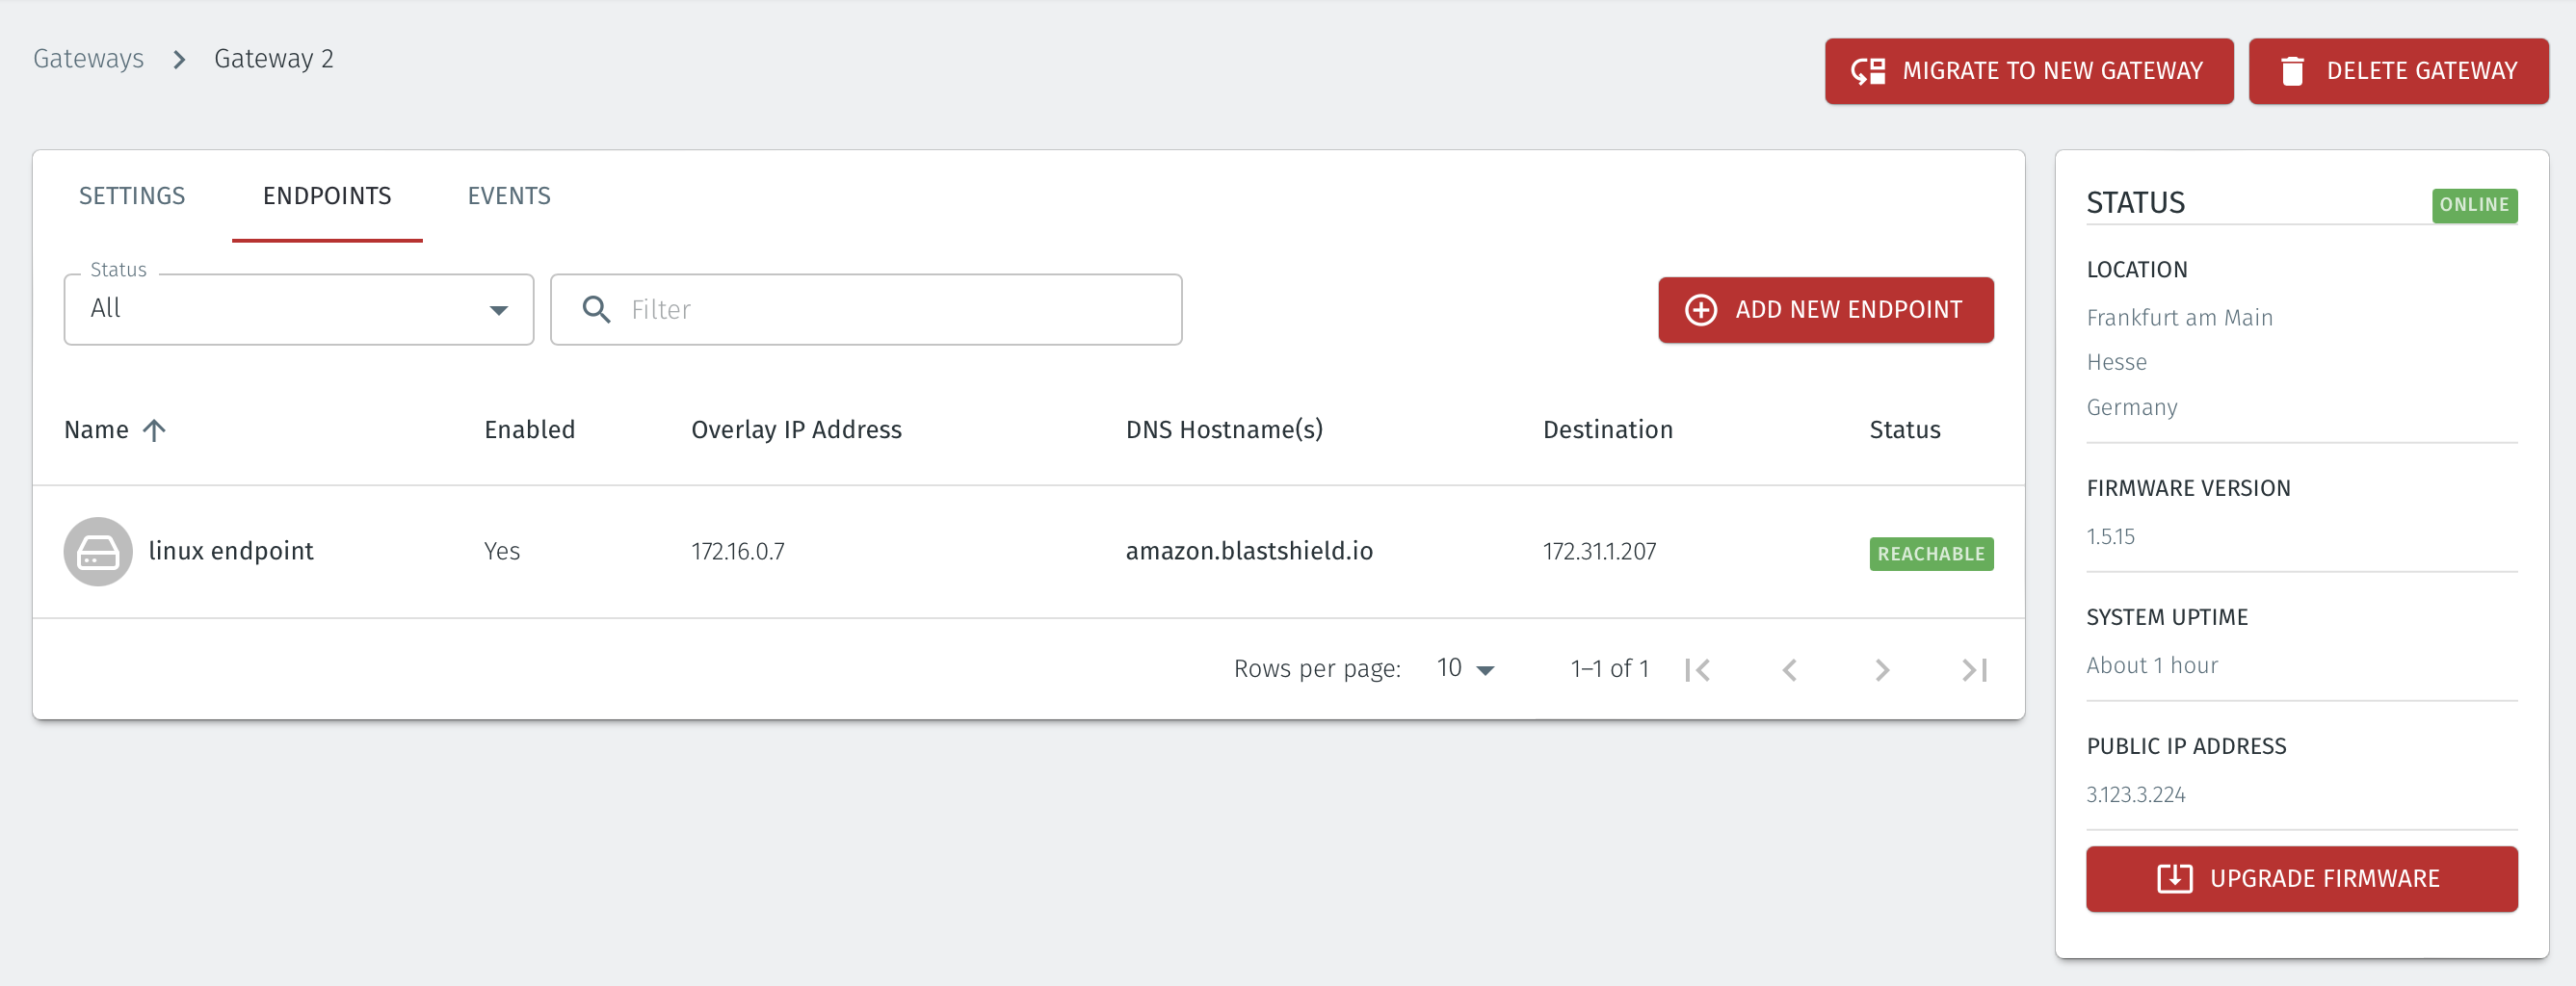
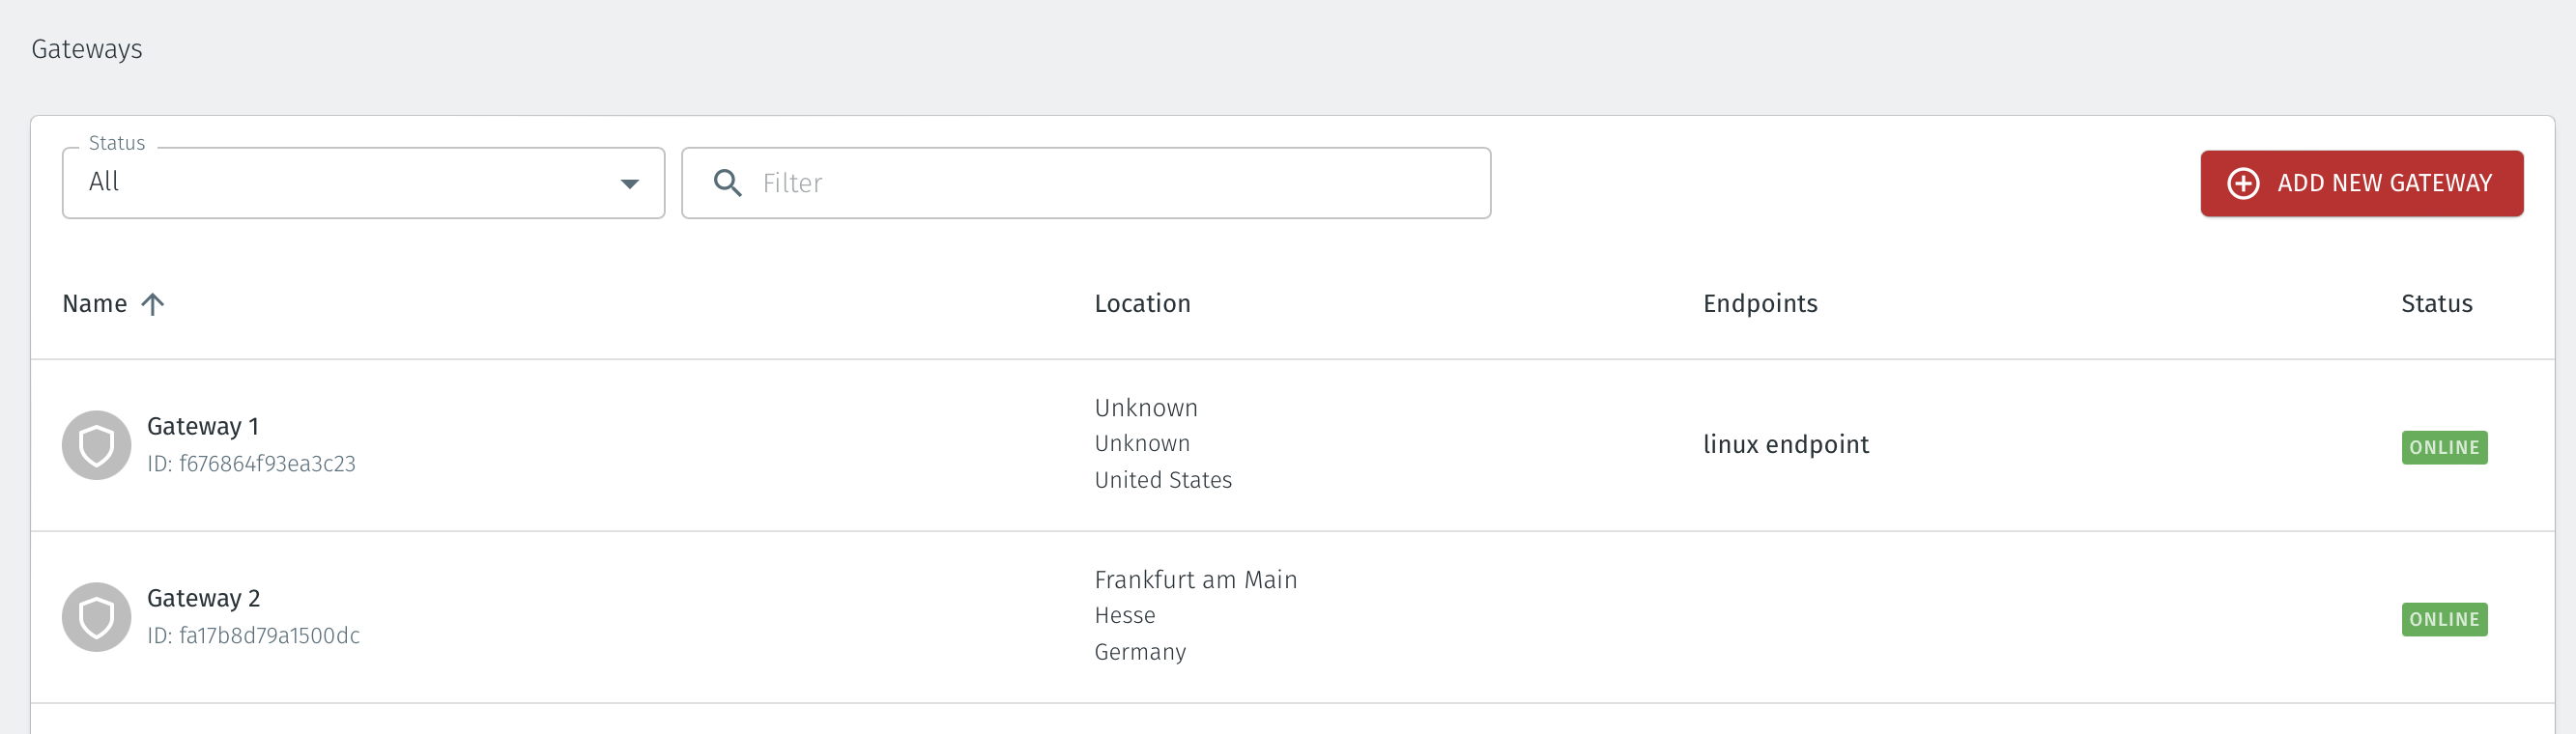
Verify both Gateways are online. Login to the Orchestrator and click on the Gateways menu on the left. In this example we will migrate the endpoint and settings from Gateway 1 to Gateway 2. Both Gateways are online and there is one configured endpoint on Gateway 1 which will be migrated over to Gateway 2..
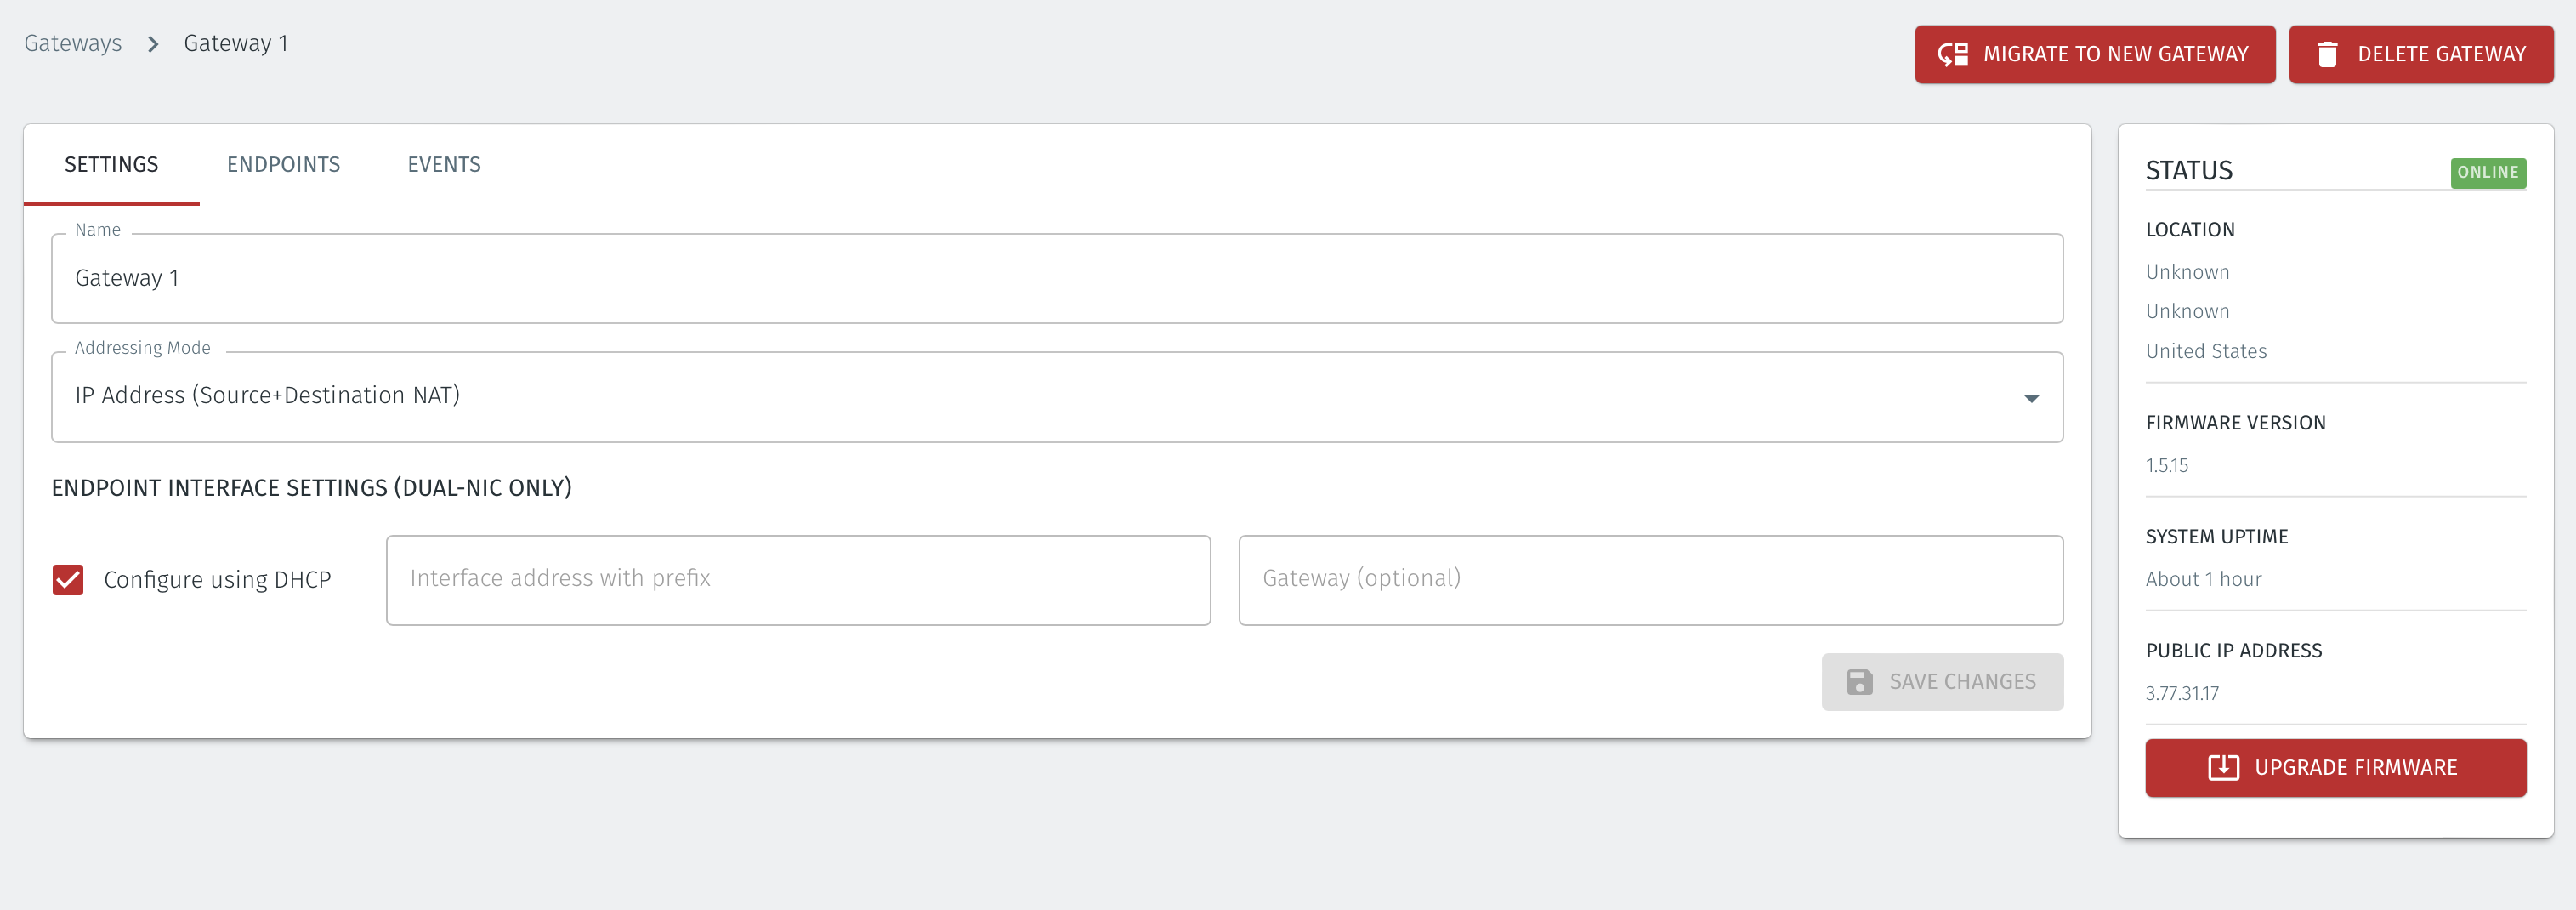
To start the migration process from Gateway 1 to Gateway 2, select Gateway 1 to open the Settings window.
Next, click the MIGRATE TO NEW GATEWAY icon and the migrate to new Gateway window will open.
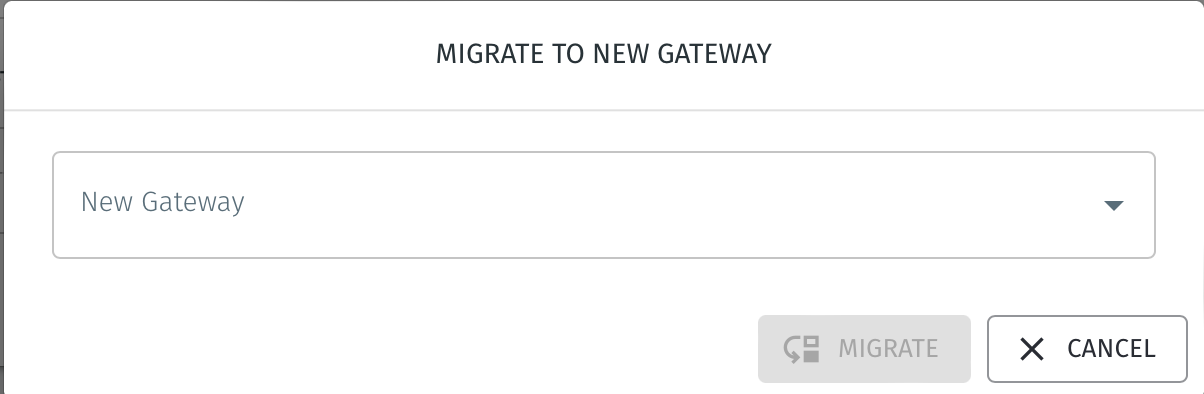
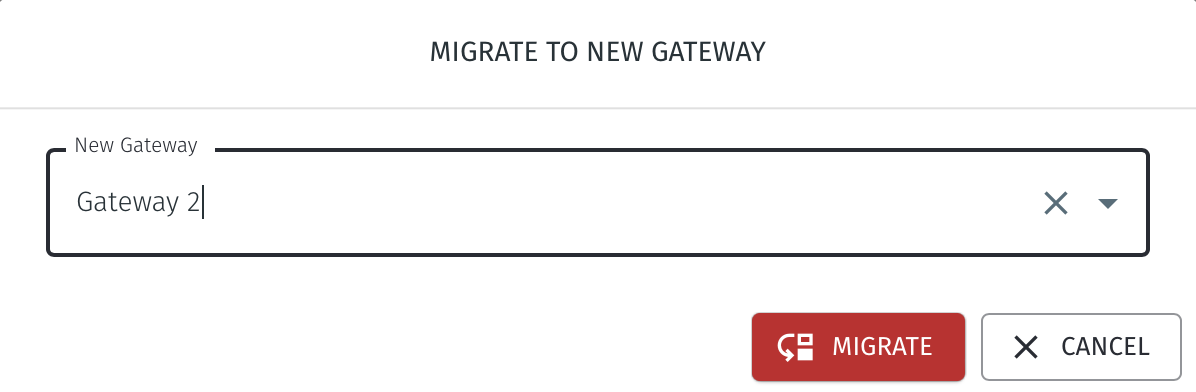
From the New Gateway drop-down, select the target Gateway which you want to migrate the Gateway endpoints and settings to.
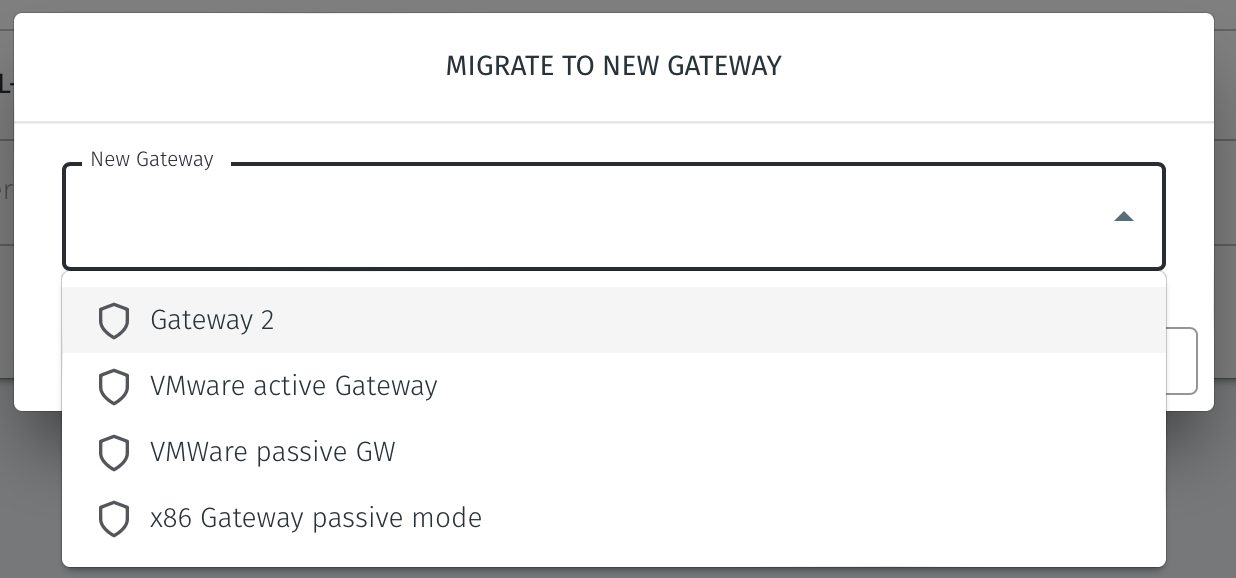
In this example we are choosing Gateway 2.
A window will open informing you that the settings and endpoints will be copied over to the target Gateway. Click YES if you want to proceed.
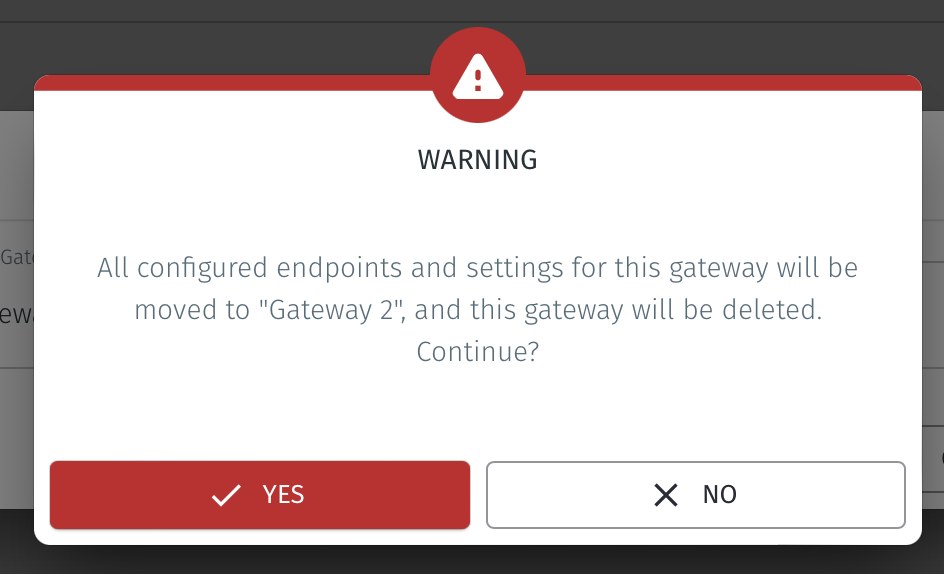
The configured endpoints and settings will then be copied across to the new Gateway. The current Gateway will be deleted. The settings and endpoint configration of the target Gateway will now have the parameters which have been copied over to it.
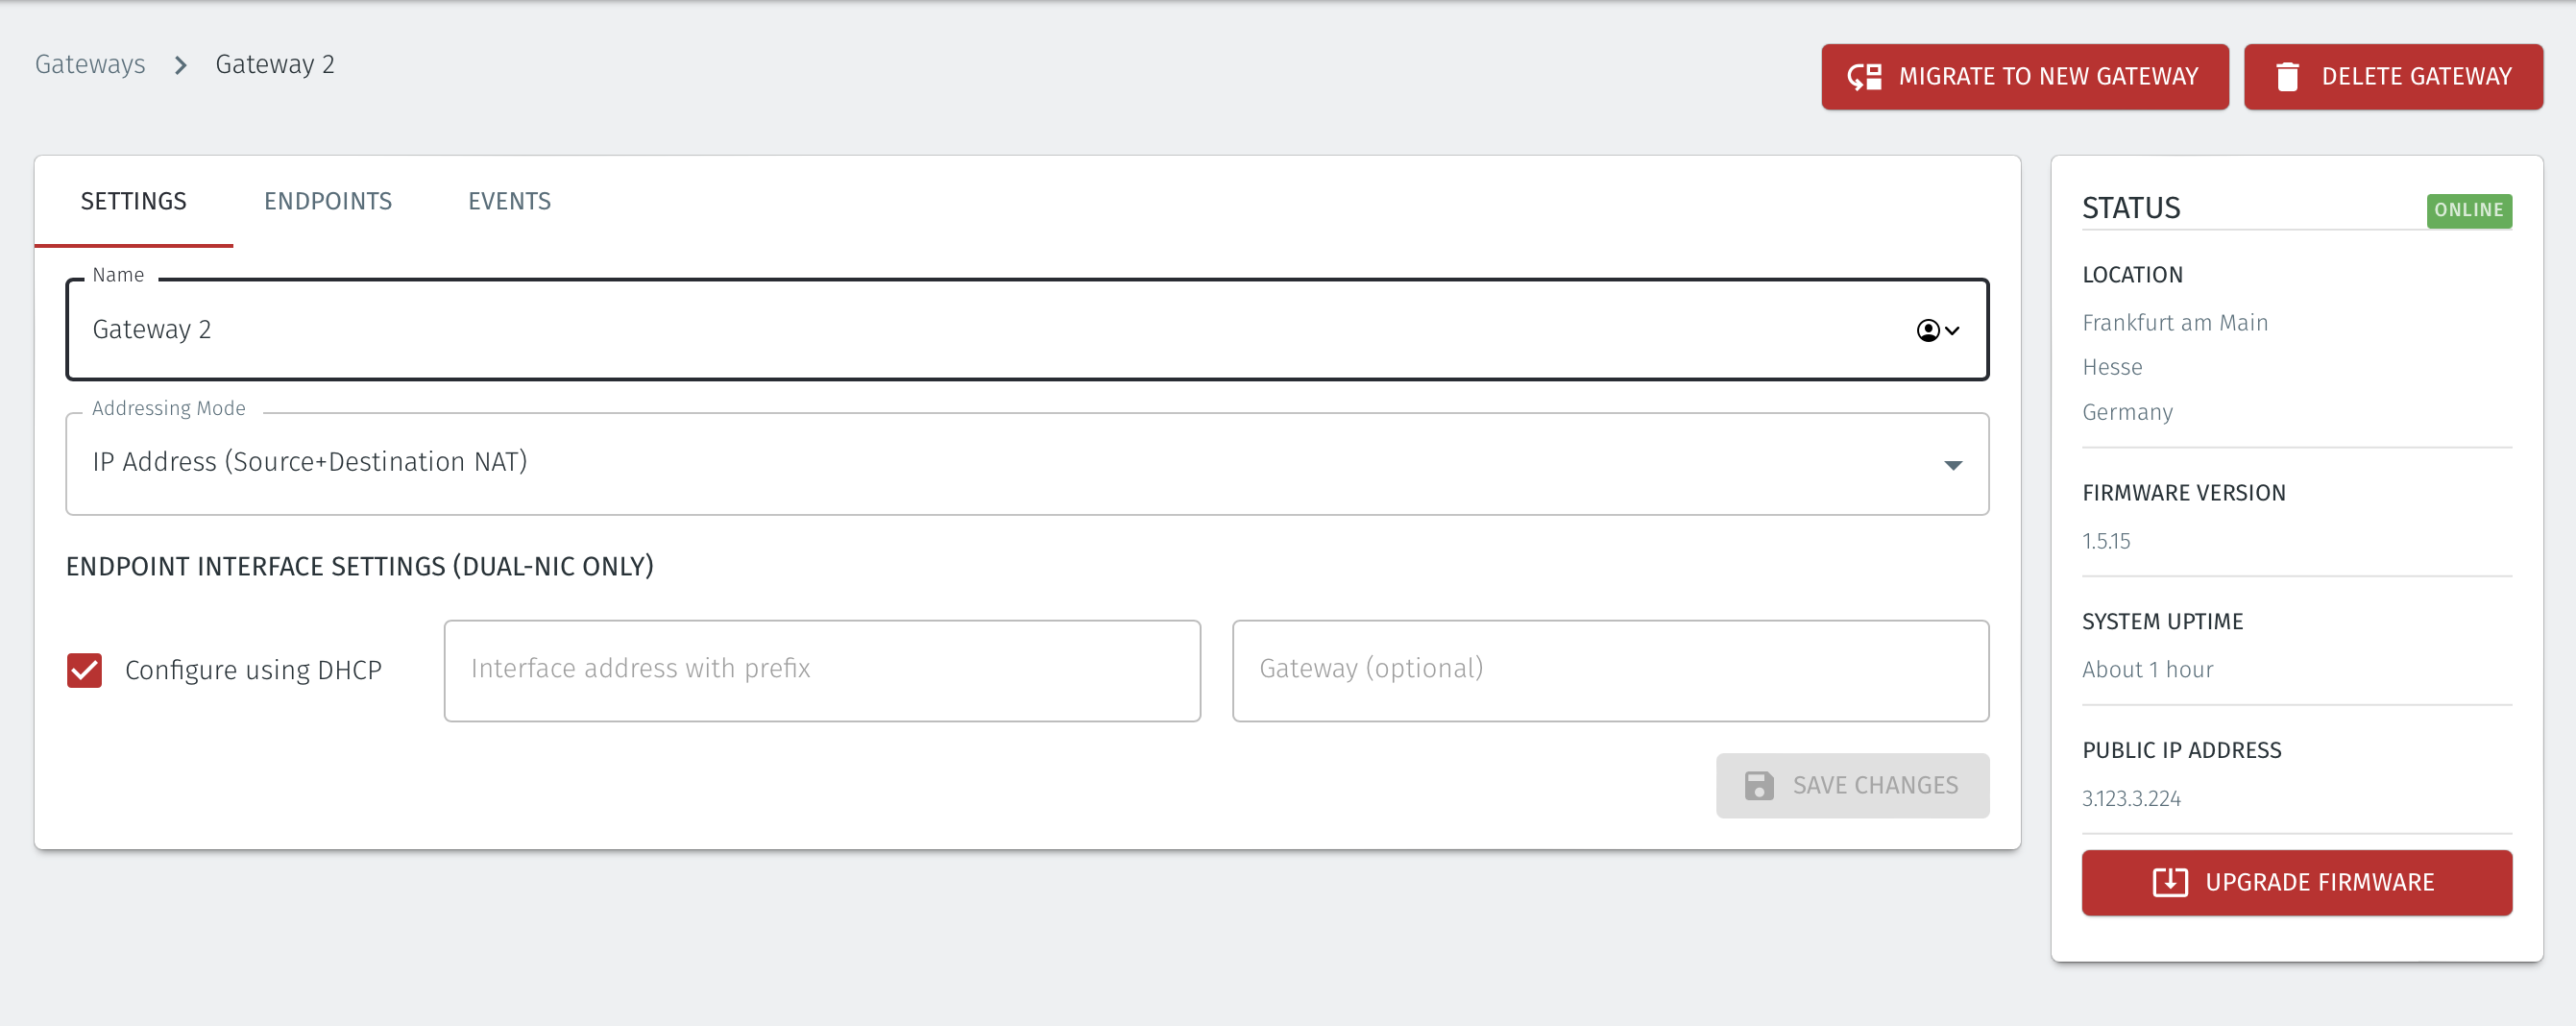
You can verify the updated Gateway settings from the Orchestrator, along with the endpoint configuration.