Agent installation on Windows using the command line
Learn how to add a new BlastShield™ Agent by watching the following video or reading the steps below.
Outbound UDP ports to all required destinations.
Resolution of DNS requests must be supported by the network.
Add a new Agent in the Orchestrator
Click on "Agents" in the "Manage" menu in the the left sidebar, and then click the red "Add New Agent" button at the top right.
The New Agent dialogue opens. Add a name for the Agent and a DNS Hostname.
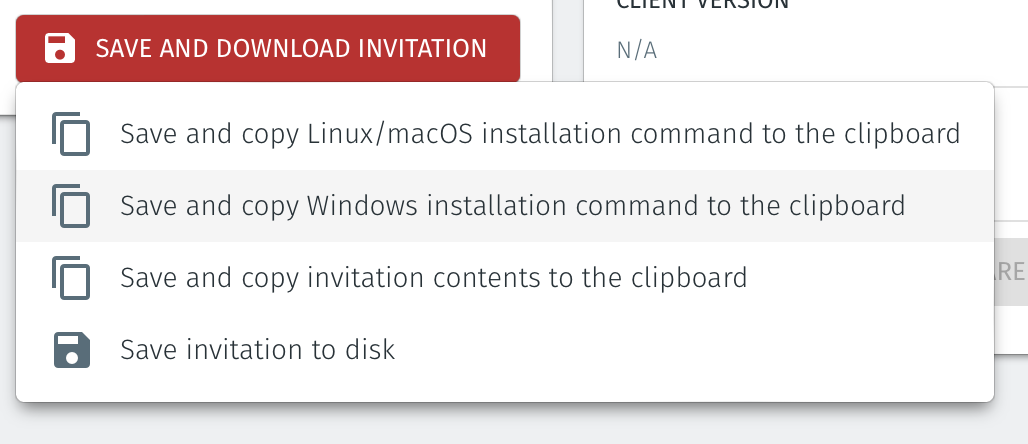
Then click on the red "Save and Download Invitation" button and choose the option for "Save and copy Windows Installation command to the clipboard". Click on that option to copy the command.
Install and register the Agent
Open a command line session on the host where you are going to install the Agent.
Paste the command you just copied to the command line and hit enter. This will start the software download.
The software will automatically install and run. The Agent will then automatically register with the Orchestrator. You can monitor the progress in the command line window.
Check the status of the Agent
On the host where you have installed the Agent, open the Services app and verify that the BlastShield Agent service is running, as shown in the image below. If it is not running then right click on the BlastShield Agent service and choose
Start.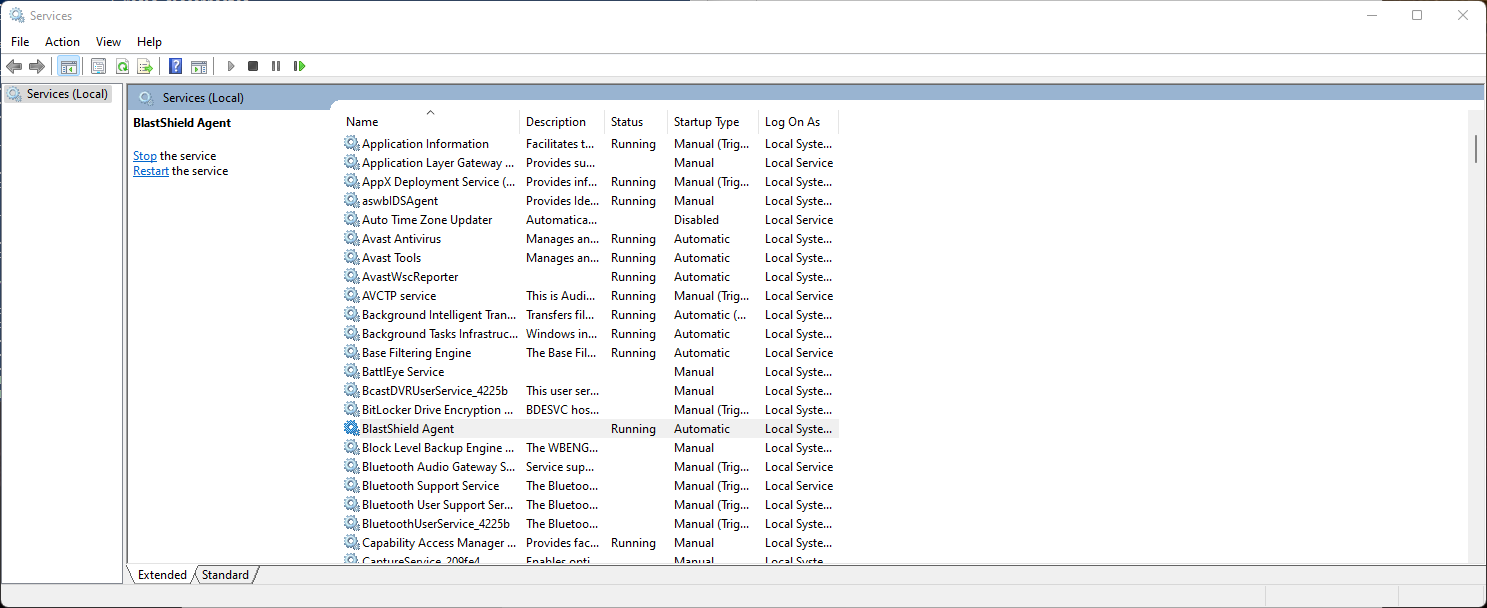
Go to the Orchestrator and click on the Agents Menu, find your new Agent and click on it. The status of the new Agent should appear as "Online" in the Orchestrator as shown in the image below.

To remove the Agent from a Windows host, simply use the Add/Remove program functionality which is built-in to windows.
Important
After you have created and installed the Agent you must add it to a group and create a policy before you can access it. BlastShield™ is zero-trust solution and the default action when no policy is applied will be to drop connection attempts.
Please read the section below to learn how to configure an access policy and microsegmentation groups.
Configure an access policy and microsegmentation groups
About Groups
Groups allow you to micro-segment users and endpoints. A group is a logical collection of endpoints and/or users that are grouped together. Groups are connected via policies, which form the foundation for BlastShield access control and segmentation management.
Any combination of endpoints and/or users can be grouped together.
There is no limit to the number of endpoints and/or users that can be in a group.
Endpoints and users can be in one or multiple groups simultaneously.
Groups are linked together via policies to provide access between endpoints.
By default, endpoints/users cannot access or have visibility to other endpoints/users unless they are granted access via a policy
About Policies
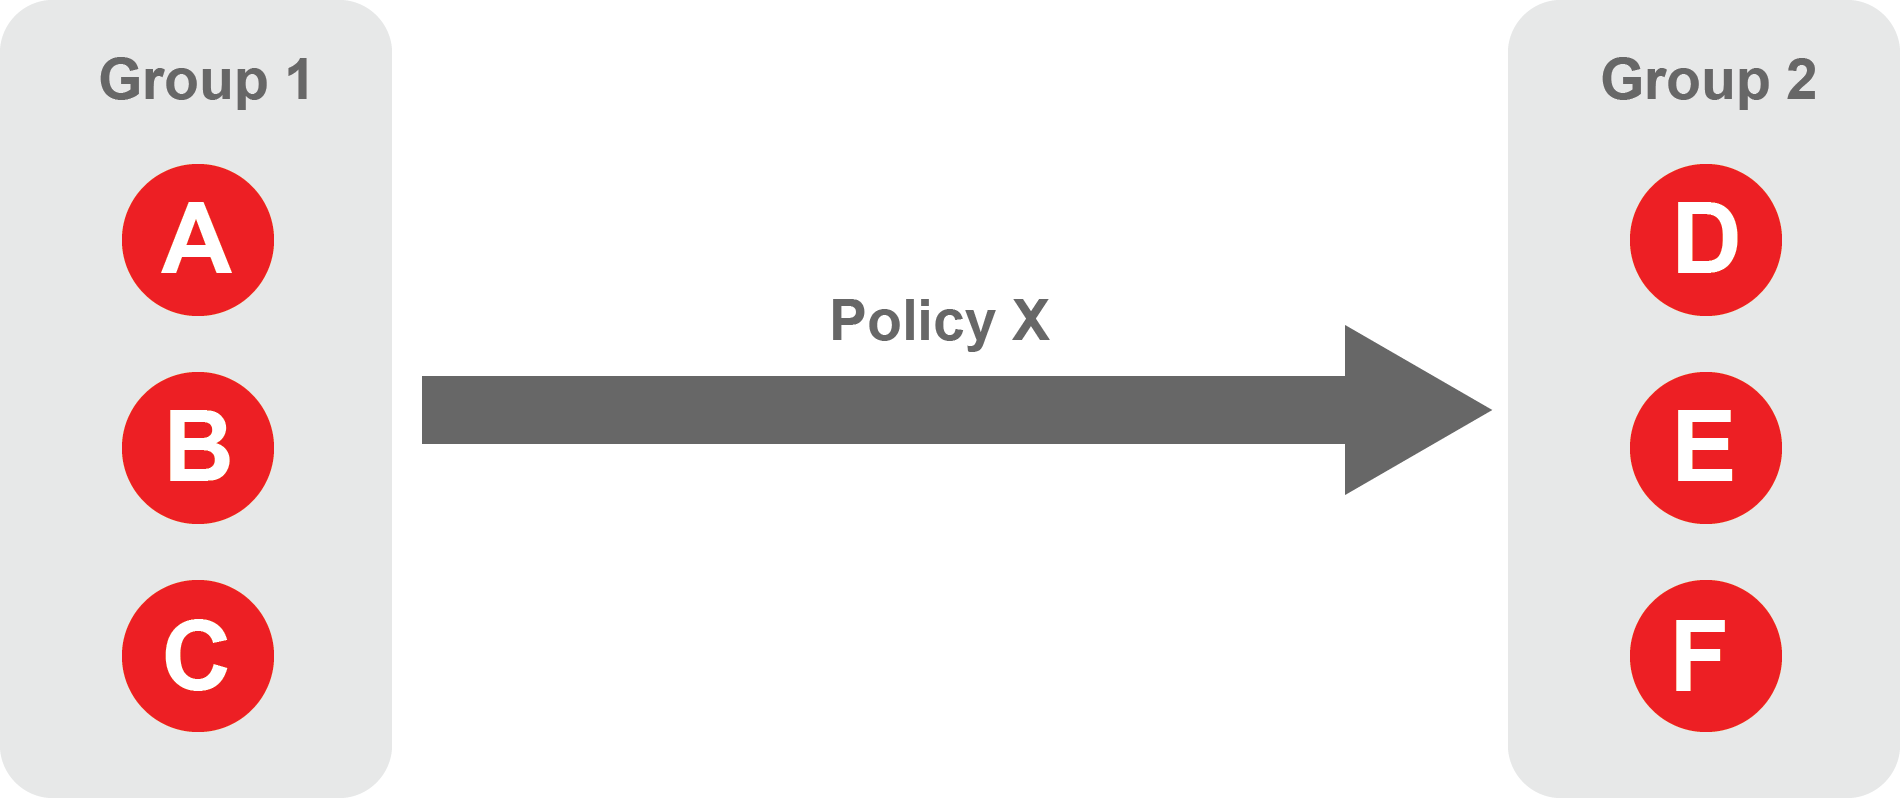
A policy defines how groups can interact. Groups are connected via policies, which form the foundation for BlastShield access control and segmentation management.
Each policy will have two sets of groups - "From" and "To".
The "From" set is one or more source groups.
The "To" set is one or more destination groups.
There is no limit to the number of groups in a given policy.
"From" Groups will have access to "To" Groups within the policy.
"To" Groups will not have access to "From" Groups within the policy.
Groups can be in one or multiple policies simultaneously.
 |
Create Groups
From the Orchestrator, select "Groups" from the left menu.
Select "Add New Group" from the Group List.
Enter a name for the new Group.
To add members to the new group, click the "Add Members" button.
If you adding users to the group then select the desired Users which you want to be associated with the Group from the "Users" box.
If you are adding Agents to the group then select the desired Agents which you want to be associated with the Group from the "Agents" box.
If you are adding Gateway Endpoints then select the desired Endpoints from the "Endpoints" box.
Alternatively, you can leave the members list empty and add/modify new members later.
Click "Add Members" to save the members.
Click "Save" to save the new group.
Repeat, if required, to ensure you have one group for your endpoints and one group for your users, which is the minimum you will need in order to define the access policy.
Please refer to the following video, which is an example of creating one group for your users and one group for Host Agents.
Create a Policy to link your Groups
Note
Users and Agents must be a member of a group for them to be used in a policy.
Select "Policies" from the left menu.
Select "Add New Policy" from the Policy List.
Enter a name for the new Policy.
Select desired "From" Groups to be associated with the new Policy.
Select desired "To" Groups to be associated with the new Policy.
Save the new Policy.
Policies are directional, so that you can control the direction in which connections may be initiated. Typically for remote access use-cases your policy would be from the "user group" to the "server group" so that users may start connections to the servers, but servers cannot start connections to users. You can create bi-directional permissions by using two policies.
The following video shows an example of creating an access Policy between a group of remote workers and a group of servers. The policy gives the remote workers authorisation to access the server group.